This is one of the diagonal fold cards. Your kit may contain different supplies but the method is the same.
Kit contents
Diagonal fold card base stamped with 'celebrate'
White envelope
DSP (designer series paper) triangle and envelope liner
Crushed Curry oval
Mint Macaron oval with stitched border
You die cut in Melon Mambo
Using glue, put very small amounts on the back of the 'you' die cut.
Place the 'you' die cut on the Mint Macaron oval.
Add glue to the back of the Mint Macaron oval (it is always best to apply your adhesive to the smaller item when layering)
Center the Mint Macaron oval on the Crushed Curry oval.
You will want to place the oval over the opening on the front of the card. Only adhere it to one of the flaps or the card will not open.
Without any adhesive, lay the oval on the front to determine where you want to secure it. Hold the to the flap you do NOT want it to be adhered to. Holding it firmly open that flap so you can see the back of the oval exposed - this is the half of the oval that will be adhered to the other flap.
In the example, I want the oval to be attached to the lower flap, so I am holding it with the top flap so i can add adhesive to the half that will be attached to the lower half.
Add dimensionals to the back of the oval that is exposed. This will get adhered to the lower flap in the example.
Remove the protective papers and holding the oval in place, close the top flap back onto the lower flap, in the process you are adhering the oval to the bottom flap using the foam adhesive dimensionals.
This photo shows the oval adhered to the lower flap - from the back side.
Finish the envelope by inserting the liner and lining the indent with the fold in the envelope.
Press your fingers against the fold as you close the envelope.
Press along the fold to make a crease in the liner.
Lift the envelope flap only, leaving the liner folded down against the back of the envelope.
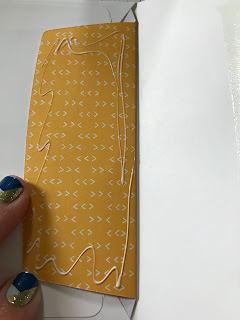
Add glue to the exposed side of the insert flap.
Close the flap again and press firmly to adhere.
A beautiful liner - such an easy way to make a card special.


No comments:
Post a Comment