I love the punch art reindeer - and it has been so much fun making a whole set of these for some scrapbook pages. Here is a layout of what you will need to make a reindeer. You can alter the colors to make each one unique.
 You can gather all these before you start or just have the punches and paper handy to punch as you go along.
Let's get started!
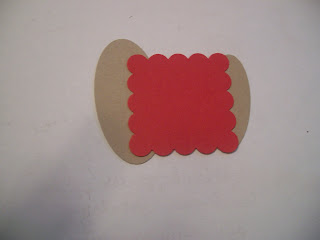 I usually start with the body. You will need the large oval and the small oval . Connect them to the scallop square which is the blanket for the reindeer.
 Trim the hearts and cut the boho flowers in half to make the shoes. The shoes can be altered by changing the color of leaving off the flower trim at the top so they look more like boots.
I think the easiest way to punch the legs is to punch your wide oval for the head then line up the punch along the edge and punch a narrow strip.
You will need two of these and then cut them in half to make the 4 legs.
 Attach the shoes to the wider end of the double-punched oval pieces. Be sure the oval curves in the correct direction.
 Attach the legs to the body. Play around with the placement to get them just where you want them.
 Next comes the head - attach the antlers to the back of the head near the top. You have to leave room for the ears.
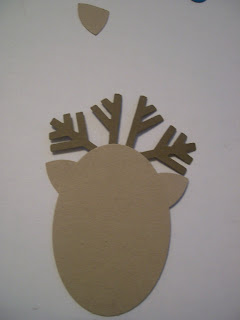 Attach the ears below the antlers. Check the position from the front.
 Add the nose and eyes - the white gel pen really makes them pop. I used a dimensional to adhere the nose. If you are doing a whole group of reindeer you would only need one with a red nose (dear old Rudolph) and the others would have basic black, basic gray or maybe early espresso for the nose.
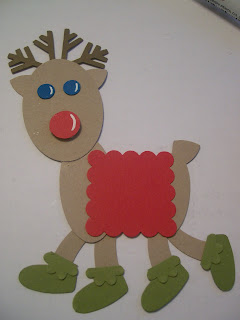 Attach the head at the neck. You can tilt it at different angles to see exactly which look you like best. Different angles give the reindeer a little attitude :-) And don't forget the tail ! I usually place the petal point downward and attach to the rear.
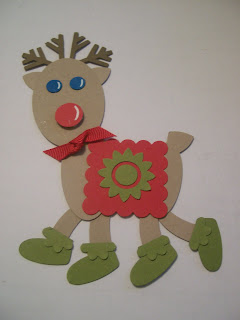 I tied a knot in the 1/4 inch real red grosgrain and glued it at the neck. Then decorate the blanket however you want. For this one I used the largest boho blossom and punched the center of the blossom using the 1/2 inch circle punch. I punched a small circle using the itty bitty punch set and placed it in the center.
If you try some - please post a link to your photos so I can check them out. Would love to see your ideas on how to decorate or improve my reindeer.


