This is a simple technique to make a one-of-a-kind background for a card. It can be messy.

Glossy Card stock
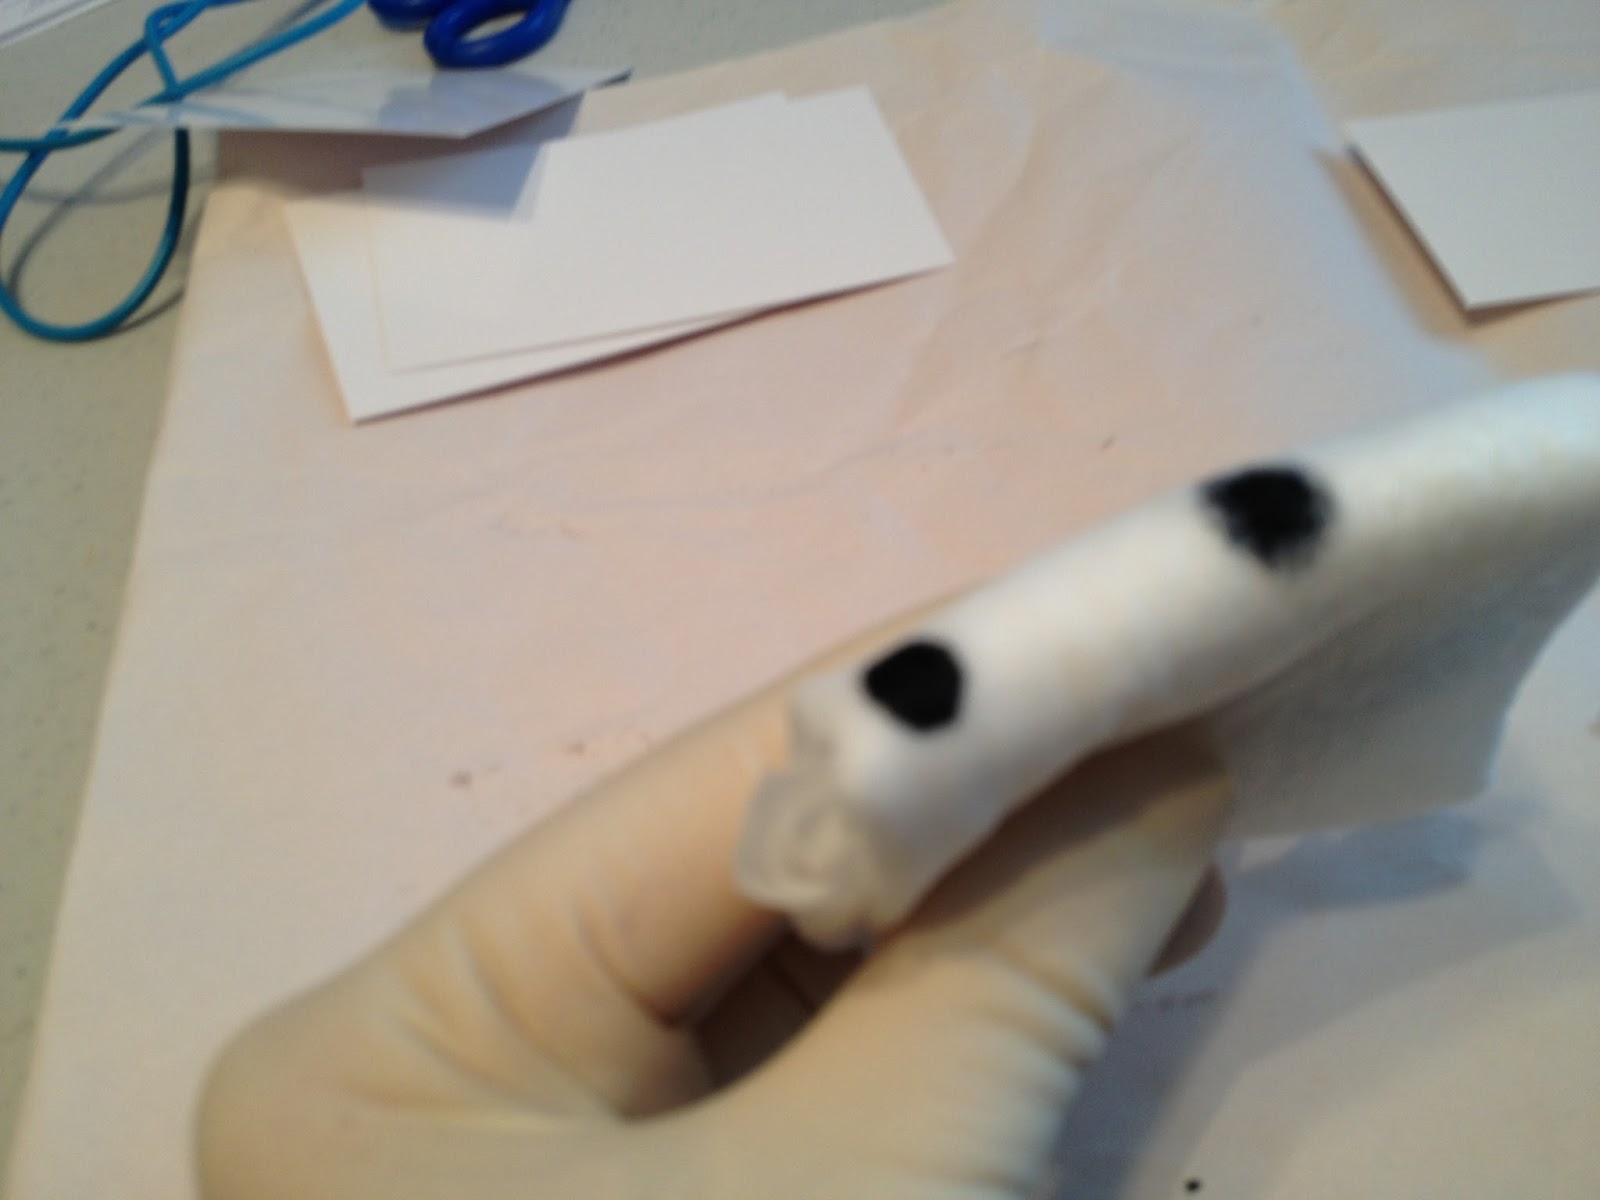
2 baby wipes - any brand
3 colors of ink refills
Paper towels and rubber gloves if you don't want ink stained hands.

Cut a piece of glossy paper a little larger than what you need for your final project. You will trim it down to the deisred size after it has dried.


Then added the More Mustard next to the first drops. Just one good drop at each position is all you need. You want a little white space between them.

And lastly the Basic Gray. Now you are ready to apply the ink to the glossy paper.

Place the applicator with the inked edge touching one edge of the glossy paper. Drag it down to the other edge. Try to make the line as straight as possible, however none of mine were very straight. That is what makes it unique.
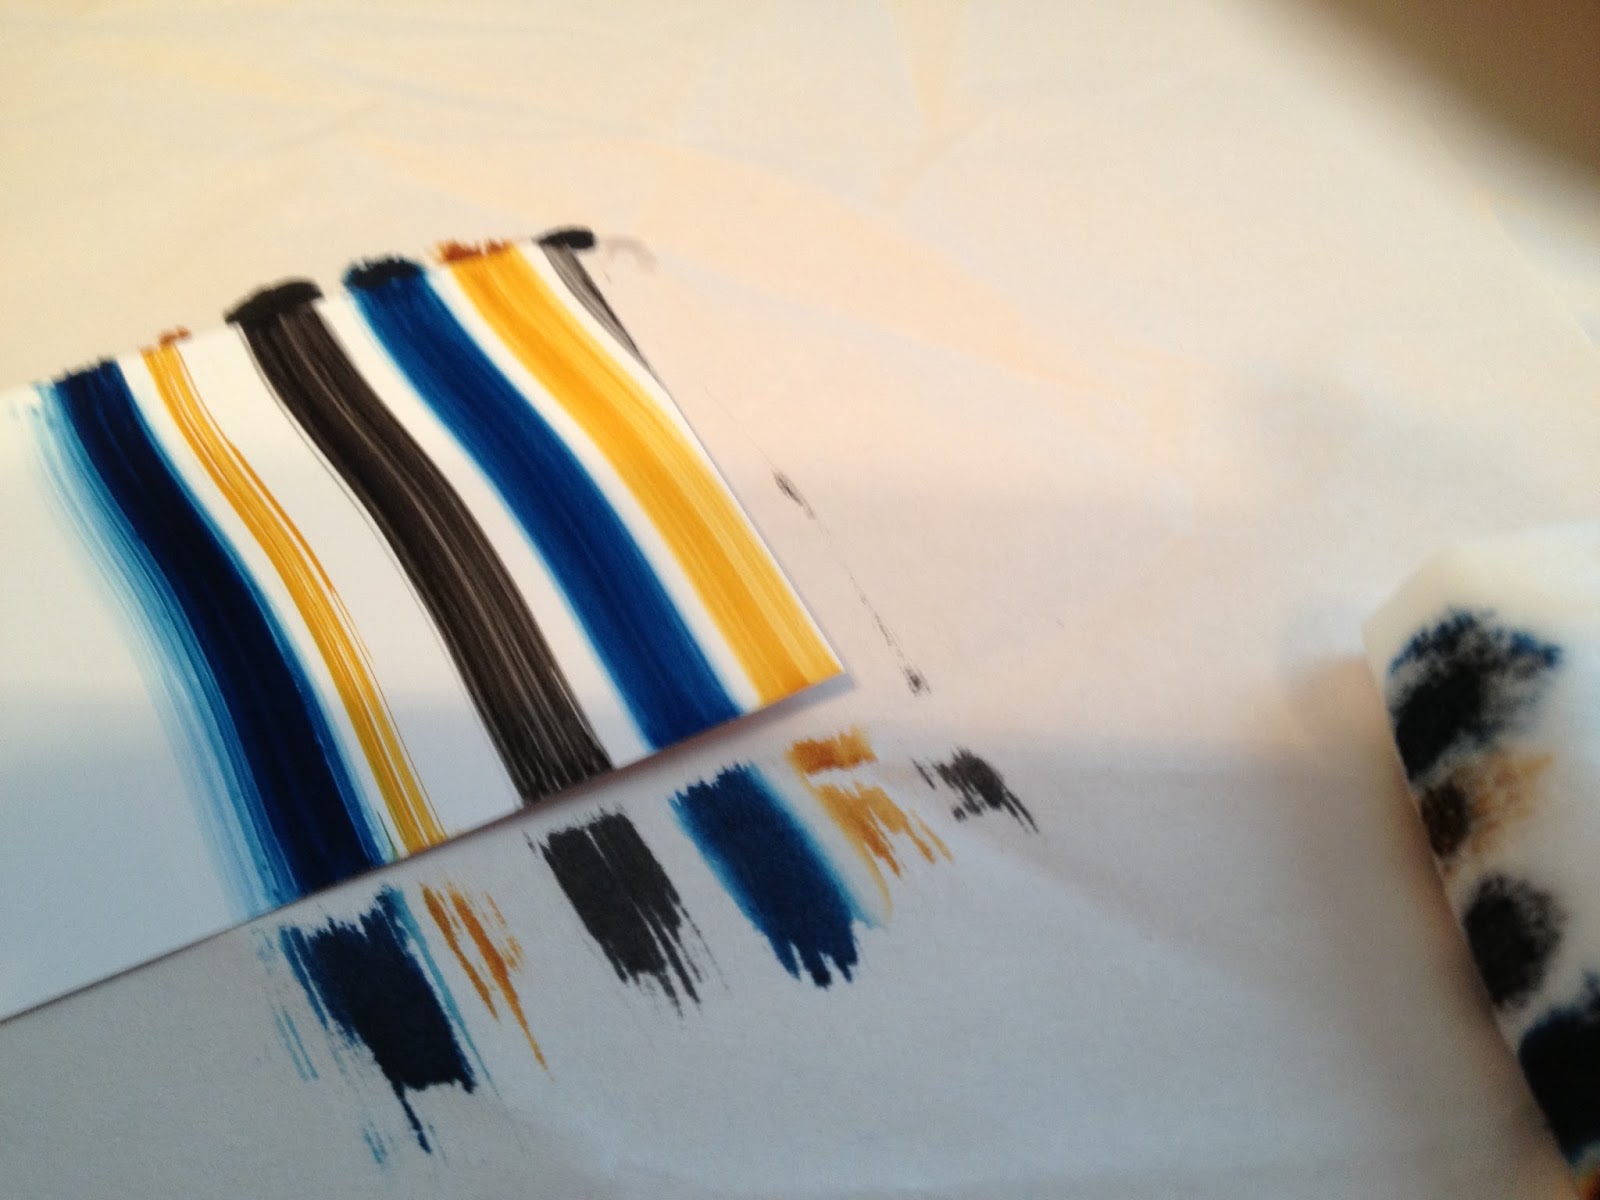
That makes the first set of stripes. You can see from the photo that my first stripe on the right (gray) did not get on the glossy paper and the yellow stripe towards the left did not cover very well. You can go over it if you want but you will be dragging more ink across the area later so it is not necessary to touch it up now.

Flip the applicator so the colors are in the opposite orders now and overlap the far right color on the applicator to the far left stripe on the paper. If you mess up and don't get them lined up in the order you planned - don't sweat it - the design is pretty forgiving,
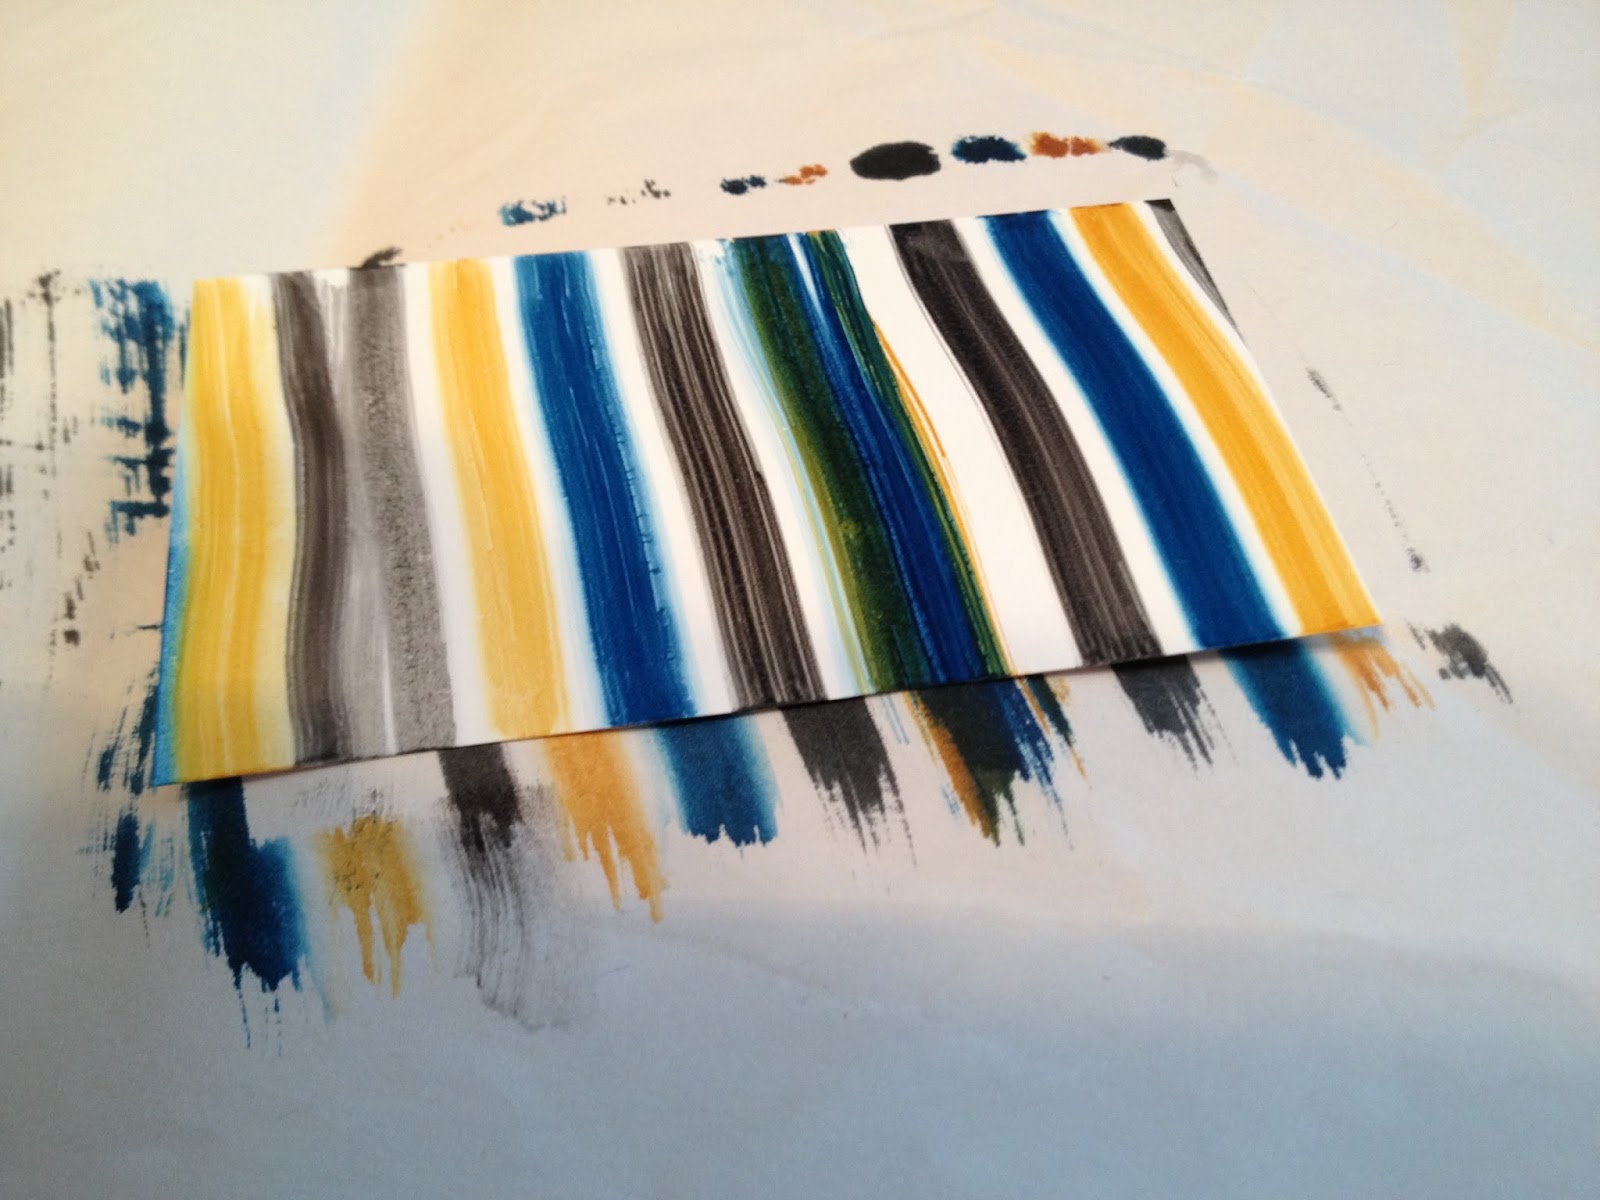
Repeat until you have covered the glossy paper with top to bottom strokes.
You may want to re-ink your applicator at this time. Be sure to put the new drops of ink in the same order and in the same location on the applicator edge.

Turn the glossy paper at right angle to the original layout and drag the applicator down at right angles to the original stripes - making the plaid design. Continue flipping the applicator between each swipe until you have covered the whole area.

In order to use up more of the ink on the applicator I continued making plaid designs without reinking. I was able to get four pieces inked before discarding my baby wipes.
Trim the plaid piece to fit your design. This is a good time to get rid of uneven or uninked edges. Use in your card making to add an interesting focal point to your card front.
