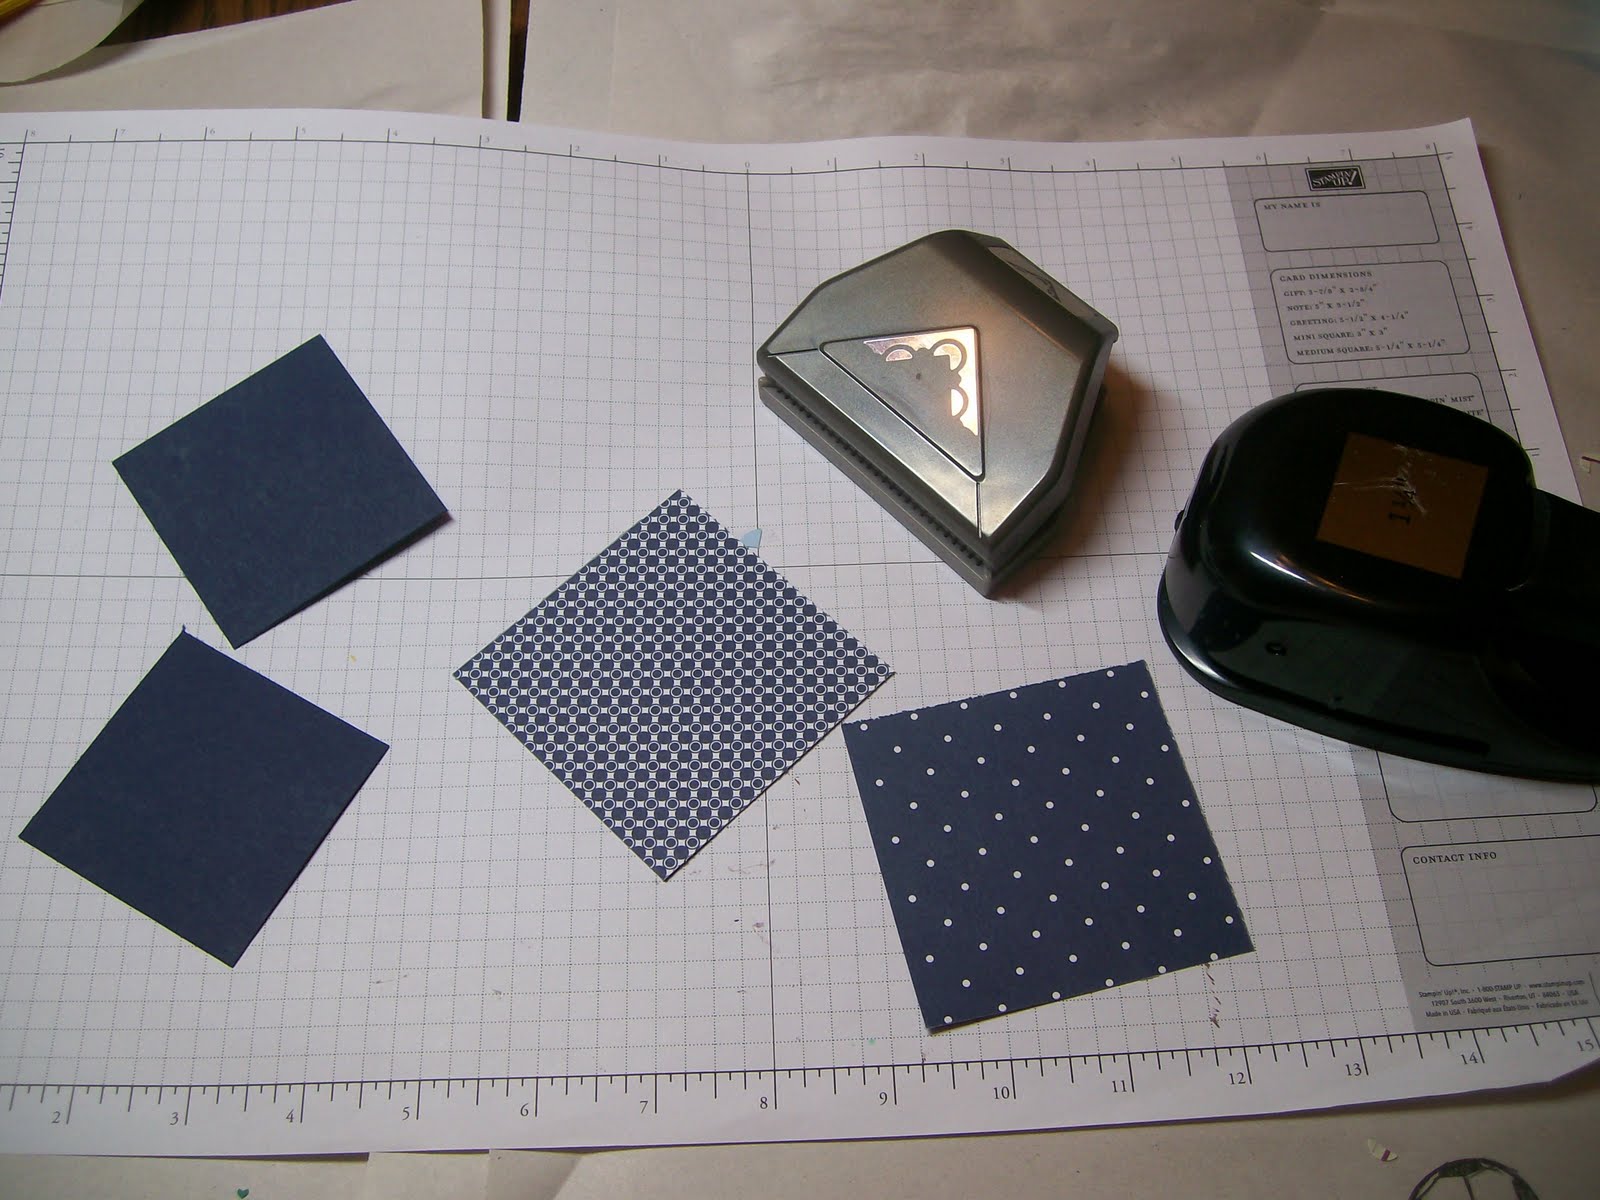
You will need two 3 inch squares of DSP of your choice and two 2.5 inch squares of the card stock that you want to use as your base. You also need the scallop corner punch and the 1 1/4 inch square punch (You can cut the squares without the punch if you don't have that one) I am using Night of Navy card stock for the base and two DSP Night of Navy sheets from the Pattern Pack III that is currently a Level I hostess gift.

Using the scallop border punch, trim the four corners of the DSP squares.

Using the 1 1/4 inch square punch cut off each corner. You can also use your paper trimmer to cut these squares.

So you now have 8 squares with one scalloped edge - 4 of each design/color.

Place one of the card stock squares at right angles to the other - glue together. Using the grid paper helps a lot getting this lined up perfectly; however, I did many without the grid paper and had no problems with them looking lopsided or off center.

Adhere one of the scalloped squares to a tip of the base - only put adhesive on the right hand side so you can later slide the last piece under the left edge.

Adhere the alternate design/color to the next tip. Alternate squares as you work clockwise around the base.

When adhering the last square you will have to work it under the first square. Then add a little adhesive to the first square's left side to adhere.
(I use Tombow glue for this and it works well - just a small drop in the corners.)

Here is the finished pinwheel. Since my centers rarely match up perfectly I add a sentiment oval or a button to the center.

For this one I used the clear bitty buttons and a piece of DSP punched with the coordinating punch. These are available in the summer mini-catalog.

Here is the finished pinwheel ready to adhere to the front of a card. I loved using different DSP to see what affect I could get - here are some of my finished products:

This one uses Cottage Wall DSP on a Very Vanilla base then placed on a Rich Razzleberry card base. I also used Rich Razzleberry and Orchid Opulence punched with the Boho Blossom punch behind the bitty button.

This is also Cottage Wall on a Rich Razzleberry base on an Orchid Opulence card. The sentiment is stamped using Rich Razzleberry on Orchid Opulence and then mounted on the Rich Razzleberry scallop oval The ribbon is 5/8 inch grosgrain Old Olive just tied in a knot and adhered with a mini glue dot.(This is one of my favorites!)

For this one I used 4 of the colors in the Pattern Pack III (hostess gift in the current catalog), Mellow Moss, Night of Navy, Sahara Sand and Ruby Red placed on a Very Vanilla base. The sentiment is stamped in Not Quite Navy on Very Vanilla mounted to a Sahara Sand scallop oval. The card base is also Sahara Sand.

This one also used the Pattern Packs III paper - only the Ruby Red and Sahara Sand mounted on Night of Navy card stock. The card base is Sahara Sand. Using the same design but different colors gives the pinwheel a different look.

This is the pinwheels I made in the tutorial - I place it on a card of Sahara Sand. I love these because I can just make up the basic card and add the sentiment later. Or use with no sentiment and just write the message inside. Great cards to have on hand!

This one uses Bella Bleu and I think it has a different look because the papers sort of blend together. Love this one!

The Bella Bleu one gave me the idea to try one using just one DSP and here it is. This is also a cute idea. The scallops give the card a sort of 'doily' look. I liked making these so much I have added them to our club agenda for today. I am going to just let the ladies pick their DSP and colors and decide what type they want to make.

I think the very first one I made is still my favorite (maybe because it is my daughter's wedding colors :-) I do think the background card stock makes a difference. You want to be sure there is enough contrast so the scallops show up nicely.
Hope you enjoyed my little adventure with the pinwheel. If you make some - please share your pictures - and if you would like to make some but don't have the tools/supplies contact me, I can help you get them :-)
Very pretty variations! Thank you for sharing all of them!
ReplyDeleteawesome group of scalloped pinwheel cards... thanks for sharing ~ Pam
ReplyDeleteThanks for the tutorial. I like this scallop variation and think I'm going to try it in my class this weekend.
ReplyDeleteYou're welcome. It is interesting to see the different papers and how they all look different.
ReplyDelete