Baby Shower Favors-
Sour cream container favors decorated using the watercolor crayons and blender pens.
12 x 12 Whisper White card stock
Baby Tees Stampin Wheel
3/8 inch taffetta ribbon - I used So Saffron
Watercolor crayons
Blender pens
I stamped rows of the baby tees on the 12 x 12 paper. It was easy using the ink cartridge and Basic Gray ink refill. I also used the guide that Stampin Up sells for the wheels. I have not used the ink cartridge and guide before but they sure made the task much easier. I did still mess up on a couple rows but not pressing evening and getting some gaps in the design. I turned the paper over and tried again. I did a lot of these so I have several sheets left to use as pages in a scrapbook. I can also sut and use them on card front and I love cutting out the individual onesie to use on a card front or as a gift tag. So if your rows are not perfect, don't throw them away - cut out any good tees and use them as accents.
I placed the design so there was an inch from the edge and 2 inches between. The design is 2 inches wide so I placed the guide for my bottom row at 3 inches, the middle row at 7 inches and the top row at 11 inches. (Love the grid paper - it really helps).
I cut the paper into 4 inch strips and then cut those in half at the 6 inch mark. Then I started coloring with the So Saffron. My granddaughter's nursery is in yellow and gray so that is the color theme for our shower. I colored with the crayon to just get it on the paper. You don't have to be real particular since the blender pen with help smooth it out. Noticed the 'scribbling' here.
I took a blender pen and went over the area. So much easier then trying to get it smooth looking with the crayon. To clean your blender pen between colors just scribble on some scrap paper until the color is all gone. The tip may be stained a little but that is okay. A friend makes sure she uses one tip for reds/pinks, another for yellows, another for blues, another for greens, another for purples, etc. I am not organized but a helpful hint is - before using a blender pen scribble on some scrap paper to make sure the previous user cleaned the pen when finished.
Another way to use the blender pen and crayon is to take the tip of the pen and pick up a little color from the crayon - just rub them gently together.
Then color in the design. This works really well for small areas like the little heart on the elephant's trunk. Once the design is all colored as you want, you can start constructing the sour cream container.

This particular one is one of the rows that did not stamp well and I re-stamped on the reverse side so there are uncolored tees on this - you can also see in the lower left corner where I scribbled to clean my blender pen :-) This is the inside of the container so it will not be seen until the recipient opens it for her treat - but hopefully she will love the chocolate so much she won't care :-) Place a strip of Sticky Strip along the edge you want to overlap on top of the other. I also curled the paper a little. If you are using Designer Series Paper, that is probably not necessary but card stock is stiffer and harder to curve into the tube shape. Remove the red protective strip and roll the card stock up overlapping the sticky strip adhesive on the opposite edge of the card stock. This will make a tube like a toilet paper roll.

Here is the roll. You then pinch the bottom edge together and make creases along the side edge. This is ONLY DONE TO THE BOTTOM at this time. I tried to make the folds hit right next to the seam so when I did the top the seam was in the middle of the back.
Add a short piece of Sticky Strip along one side of the bottom inside the roll. Remove protective plastic and pinch the bottom firmly together.
This is the bottom closed - now you need those little ridges like the sour cream containers have. This also helps secure the bottom.
Using my crimper, I insert the bottom and roll un about 3/4 inch. If you don't go far enough the first time - put it back in and try again. If you go too far - oh well, nobody's perfect :-) It will still make a cute favor.
Pinch the top edge together at a right angle to the bottom. DO NOT ADD STICKY STRIP but crimp it in the crimper. (I use a ribbon to tie mine together but you could fill at this point and then use Sticky Strip to seal it closed - exactly like the sour cream containers. I just like the bow on them and then the recipient does not have to tear it open.)
Using a Crop-a-dile, make two holes near the center of the top edge.
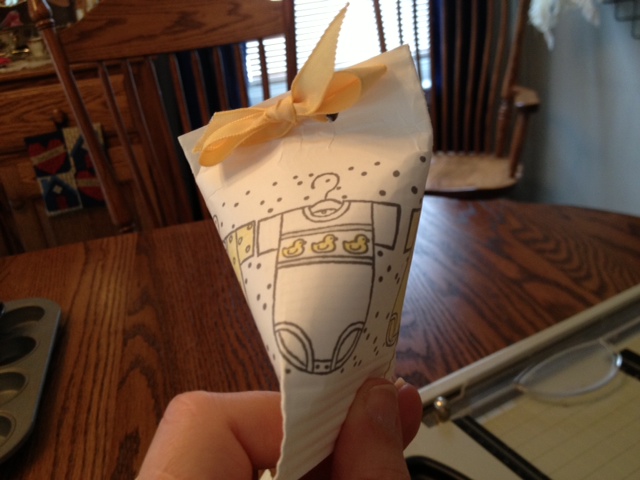
Run a ribbon through the holes with the ends toward the front. The seam in the paper roll should be along the back side.
Fill with sweets or a small surprise and tie a bow to close it. These are so easy and quick. I made 36 of them in a couple hours even with all the coloring I did. It would be even faster if you used a decorative Designer Series Paper.


Vey cute! Thanks for the quick and easy party favor idea!
ReplyDelete