Wednesday, June 15, 2011

Waterfall Cards

Waterfall cards are very impressive but not that difficult to make. I have had fun playing with different stamp sets on these.


These are two I made for a club in April.


You will need a piece of Designer Series Paper (DSP) cut 5 1/4 x 4. I used Sweet and Sour but Stampin Up has so many beautiful papers, it is hard to choose.

Card stock in coordinating colors -
Card base - 5 1/2 x 4 1/4 (I used Pumpkin Pie)
Pull strip - 9 x 2 ( I used Pumpkin Pie)
Base for images - 2 x 2 inch squares, you need 4 (I used Rose Red)
Stamped images - 1 3/4 x 1 3/4 inch squares, you need 4 (I used Daffodil Delight)
Cross-bar - 4 1/4 x 1 inch (I used Daffodil Delight)

You will also need 1 3/8 inch circle punch, two brads, sticky strip, your favorite adhesive and other items as need to decorate the card if desired.


Stamp your images on the 1 3/4 inch squares and trim if desired. I like using the round corner punch on opposite corners. This stamp set is a retired one but I just received it this week from a friend. I love it!


Mount these on the 2 inch squares and set aside.


Adhere the piece of DSP to the 5 1/2 x 4 1/4 inch piece of card stock. The card stock I used here had been embossed using the Big Shot butyou can just use plain card stock.


Using a tiny bit of Snail Adhesive or Tombow liquid ahesive on just the narrow edges of the 1 x 4 1/4 inch place in across DSP. Do not put any adhesive in the middle as that is where your 'waterfall' will slide.


Using the circle punch, cut a half-circle in the center of the short edge.
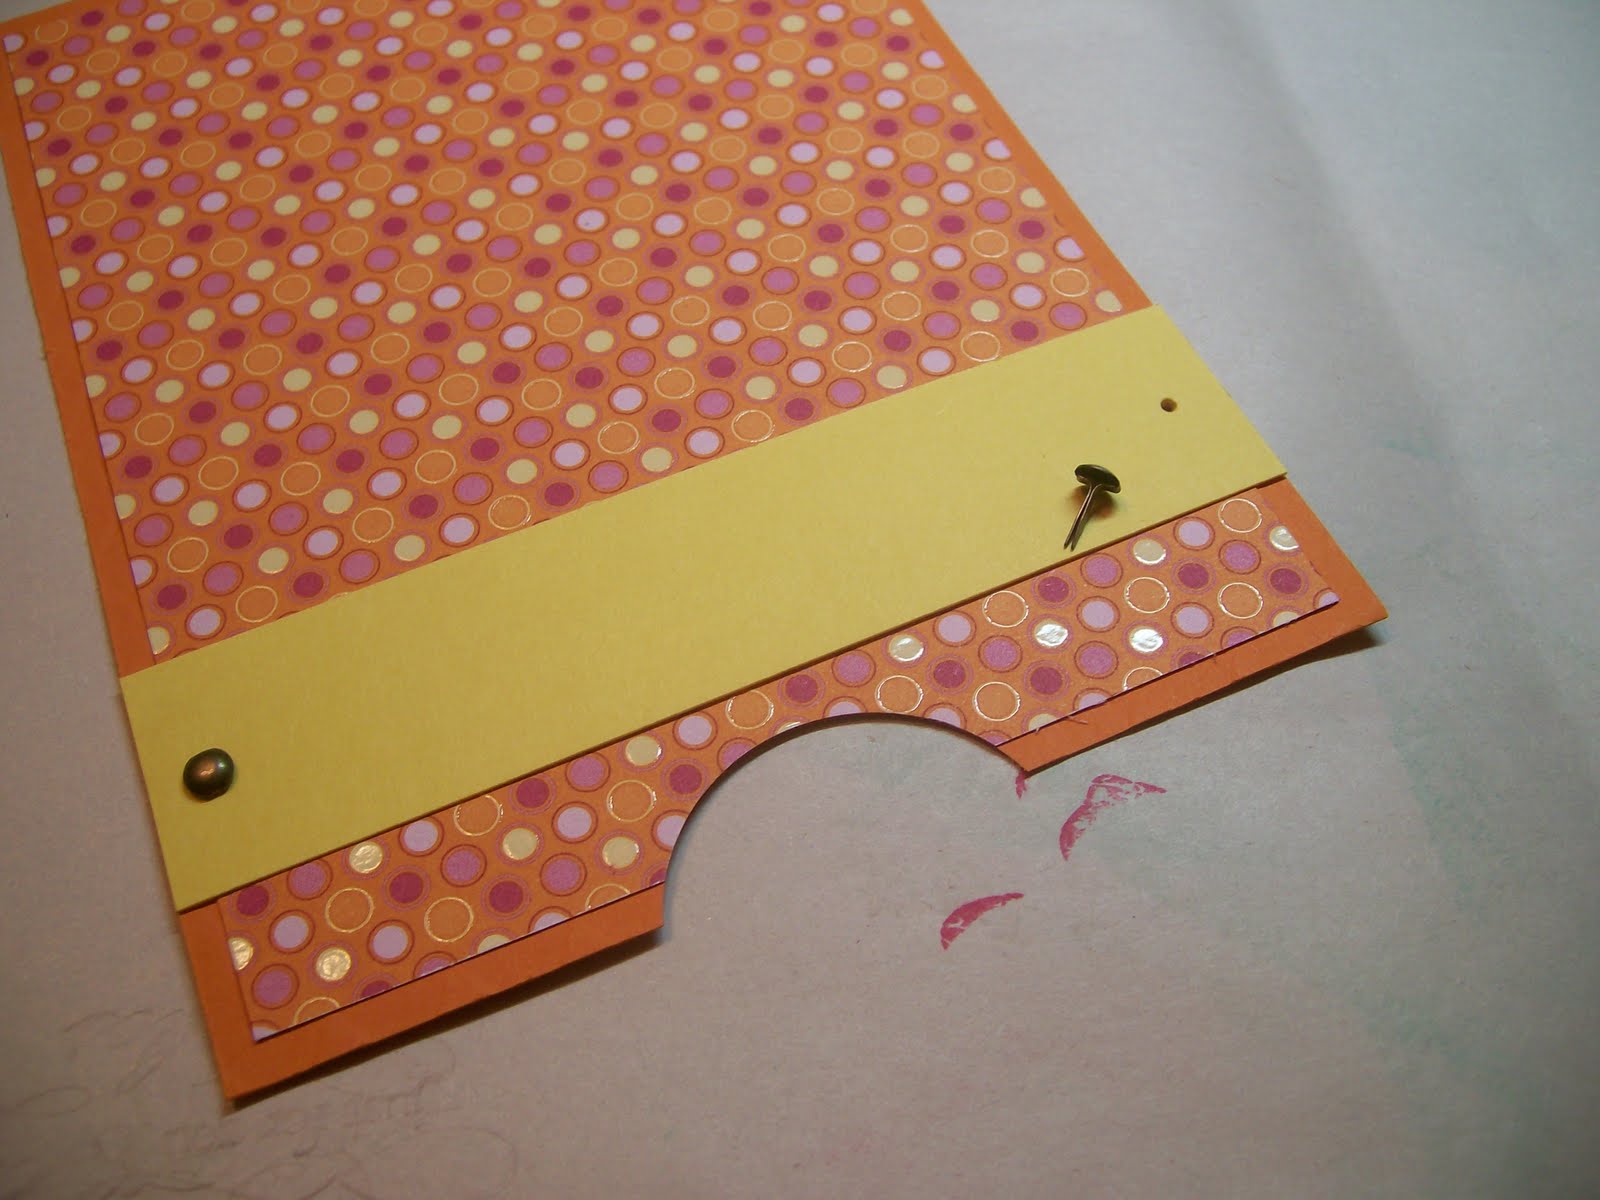


Add a couple brads to the edges of the cross-bar strip.


Along the long edge of the 2 x 9 inch strip - score at 2, 2 3/4, 3 1/2, and 4 1/4 inches. Fold all in the same direction.

The pull strip should look like this.


Slide the longer portion (4 3/4 inch long) under the cross - bar.


Adhere a strip of Sticky Strip to the bottom edge of the cross-bar. Expose the adhesive.


Line up the free edge with the lower edge of the brace.


Place the first 2 x 2 square item onto the end that was just placed behimd the brace. This first image will actully be the last one to display.


For the second image piece, only put adhesive along the upper 1/2 inch of the square or it will adhere to the previous image.


Place the second image lined up with the score line.


This picutre shows that only the top 1/2 inch of the image has adhesive so the square is free to flip up and over.


Stamp a greeting on the pull strip if desired.


Add a ribbon to the pull tab if you like.


Here is the finished card.
If you want to cover the bards on the back, here is an idea.


Punch two circles. Remove brads and glue just 1/2 of each circle over the brad holes.


From the back, pierce a hole through the circle front for the brad.


Put the brad through. DO NOT push the brad through the circle on the back of the card.


Glue down the remaining 1/2 of the circle to cover the brad.


This is the finished card.


This is another card I made using the shoe stamp set. The scallop circle pieces were embossed with the Vintage Wallpaper embossing folder.

I stamped the shoes on Whisper White and colored using the Many Marvelous Markers.


Such fun stamps, shoes and 4 greetings.


If you make a waterfall card, please post a comment so I can bounce over and see yours.

Monday, January 31, 2011

Easy Baskets

These baskets are so easy to make and so cute! The two above are my favorites! The yellow one is embossed with the Square Lattice embossing folder to make it look woven. The pink one has fleurettes that I dyed using ink refills and a pearl jewel in the center.


Start with a square of card stock. Here are some measurements I used that work well. You have to score it into 3 rows of 3 squares so it works well if you use measurements that are easily divided by 3. Score each side of the square and you will wind up with the 9 squares.

3 inch square, score at 1 inch, handle 4 inches
3 3/4 inch square, score at 1 1/4 inch, handle 5 inches
4 1/2 inch square, score at 1 1/2 inch, handle 6 inches
5 1/4 inch square, score at 1 3/4 inch, handle 7 inches
6 inch square, score at 2 inch, handle 8 inches
Emboss the square if desired. Here I used the Elegant Lines embossing folder. It is easier to score the lines


Fold all the score lines in the same direction.

Cut the score lines to the intersecting line on two opposite sides.


Round the four corners using the corner punch.


Fold up the corners on the sides that were cut until they overlap. Secure with a little Tombow glue.


Using the 1/16 inch punch, make a hole on either side to attach the handle.


Punch a hole at the ends of the handle at about 1/4 inch from the edge. I also embossed the handle. It was too long to get embossed the whole length so after I ran it through the first time, I turned it 180 degrees and embossed the other end, just pushing it through enough to meet what was already embossed.


Put brads through the basket and handle and you are done! These are nice because the handle can be pushed to one side and they stack inside each other for storage. Wouldn't these be cute with candy in them or a bunch for Easter full of jelly beans?

Thursday, December 30, 2010

Purse Post-It


Many have asked for the Purse Post-it instructions so here they are - if you want to make a template just follow the instructions up to the point where I start adding the ribbon handle. Keep that piece of card stock as your template. The dimensions will work with a standard 3 x 3 inch pad of Post-its. I usually split the pad in half and put only one half in each purse- they fit better that way.

Cut a piece of card stock 4 7/16 by 8 inches. Measuring from one of the short edges (this will be the flap of the purse - we will call it edge A), score at 1 1/8 and 1 3/8 inches. Turn it and measure from the other short edge (the bottom of the purse, we will call this edge B) and score at 3 and 3 1/2 inches. ( I used Dusty Durango from Stampin Up for this one.)

On edge A make a mark 3/4 inch from each corner.
On edge B make a mark 1/2 inch from each corner.


I draw a dashed line to help in the cutting. Connect the marks on edge A to the 3 1/2 inch score line. Connect the marks on edge B to the 3 inch score line.

This is one of the corners with the 1/2 inch mark and diagonal line drawn to the score line.

Cut along the lines to create the angled sides of the purse.
There- you have your template.

To complete the purse. Fold along the score lines. Attach a piece of ribbon or cording (the 1/4 inch grosgrain ribbon from Stampin Up works perfectly - I used Very Vanilla) between the score lines closest to edge A. Be careful to not twist the 'handle' when attaching. I used Sticky Strip to attach mine.

To decorate the front and back I cut two 1 1/2 inch strips of a card stock and two 1 1/4 inch strips of DSP. In my sample I used Pumpkin Pie card stock and Razzleberry Lemonade DSP. The length is not critical - it just needs to be longer than the width of the purse where you are going to adhere it.

Adhere the DSP to the card stock. I put them about 1/2 from the score lines (purse bottom) so the flap does not cover the stripe on the front.

Trim down the stripe to match the purse edges. I usually flip it over and cut along the purse edge.

Since I had my Trio Flower punch out I decided to decorate it with those.
I waited to add the flowers until after adhering the stripe to the side of the purse because I wanted them evenly spaced. I should have measured the stripe, trimmed it down, added the flowers and then adhered to the purse. If I had done it that way the backs of my brads would not be showing inside. - Oh well - lesson learned.
I used my mat pack and piercing tool to evenly space the flowers. The brads are some I had pre-Stampin Up demonstrator days.

I added a piece of Velcro fastener to the flap and purse front. I have found the easiest way to do this is put the two pieces of Velcro together. Remove the paper from one piece and adhere to the purse flap where you want it. Remove the paper from the other piece (do not separate the two pieces) and push the flap down onto the purse front being careful to 'center' the flap. That way the Velcro is exactly where you want it. Now you can separate the Velcro.


The fake snap on the front is something I had from pre-Stampin Up days also. When I run out of those I will probably use a brad (vintage, silver or gold) and put it on before adding the Velcro.
Hope this wasn't too confusing. I had not made any for a while and had to re-learn the process.

It's really fun coming up with designs and color combinations. If you try this, let me know how they turned out and post a link to photos if you have them.

Tri-Fold Shutter Card

I found this card design on Split Coast Stampers, however I have edited the dimensions so it will fit in the standard invitation envelope.

For this one I used the Razzleberry Lemonade DSP, Three Little Words stamp set, Pumpkin Pie, Rich Razzleberry, Melon Mambo and Crushed Curry card stock, Melon Mambo, Rich Razzleberry and Bermuda Bay ink pads.


You will need the following cut pieces:

Color A (Pumpkin Pie) 10 1/2 x 5 1/2 inch (1 piece)

Color B (Crushed Curry) 3 1/4 x 2 1/4 inch (3 pieces)

1 1/2 x 1 1/4 inch (4 pieces)

Color C (Melon Mambo) 5 1/2 x 1 1/2 inch (2 pieces)

Color D (Rich Razzleberry) 3 1/4 x 1 1/4 inch (2 pieces)

Whisper White - 2 x 3 inch (3 pieces)

DSP #1 (goes on Color B) 1 1/4 x 1 inch (4 pieces)

DSP #2 (goes on Color C) 5 x 1 1/4 inch (2 pieces)

DSP #3 (goes on Color D) 3 x 1 inch (2 pieces)


Place one long edge of Color A at 1 1/2 inches and cut a slit from the 1 3/4 inch mark to the 8 3/4 inch mark.

Turn the piece around and repeat along the other long edge.


This will make two long slits in the piece of Color A.


Place the paper so the slits are perpendicular to the cutting line with the short edge of the paper at the 8 3/4 inch mark. Score from the outside edge just up to the cut mark. Do not score all the way along the paper. Score from the opposite edge of the paper down to the cut.
Flip the paper and repeat on the other end.


Slide the paper to the 3 1/2 inch mark and score from one edge to the other and again at the 7 inch mark.


I have found the easiest way to fold it to turn it so one short edge is away from you and fold the first score marks up and the second ones down. The paper will look like this.

Flip the paper and repeat on the other end.


Your piece will look like this. Each score line is folded the opposite way of the one next to it. Now you get to decorate.


I used Rich Razzleberry for the words, Melon Mambo for the flower portion, Bermuda Bay for the flower stem and Crushed Curry sponged around each piece.


I did the flower by stamping off to get a bold image among several muted ones. I took a sponge and added Crushed Curry around the edges of all three pieces.


I go ahead and match up all my pieces, then adhere them all before adding them to the card.


Ready to put it together.


Place the DSP ones on first as shown above.


Add the stamped images last. I used Dimensionals to the inside corners of the front and back pieces.


Isn't this a fun card that anyone would be happy to receive?