Showing posts with label tutorial. Show all posts

Sunday, September 25, 2011

Cube Card Fold

This is a cute fold I like to use for children birthday cards - although it could be used for anything.


Card Stock:Pacific Point, Garden Green, Real Red, Whisper White
Ink: Pacific Point, Garden Green, Real Red, Pumpkin Pie, Daffodil Delight, Basic Black
Stamp Set: I Dig You
Ribbon: Retired Pacitic Point Striped Grosgrain


You start with the following sized squares of card stock.
8 x 8 inches - Color A (Real Red) 1 square
3 3/4 x 3 3/4 inches - Color B ( ) 2 squares
3 1/2 x 3 1/2 inches - Color C ( ) 2 squares
3 x 3 inches - Whisper White 3 squares


You will also need some coordinating ribbon.


Score the 8 inch square (Color A) at 4 inches along both two adjoining sides. The Simply Scored from Stampin Up is great for this - but I have found I do much better staying in the grooves if I stand up - not sure why but it works for me.


The lines intersect in the center making 4 smaller squares. Cut along one of the score lines from the outer edge to the center. Turn the piece of card stock so the cut is on the right hand side as shown in the photo above. Working with the lower right square fold diagonally from center to square tip. Put adhesive on the triangle that borders the score line cut and the outer edge. You only want to add the adhesive to the triangle - not the whole square - or it will not fold.
Fold that up behind the upper right square matching the corners. This will form the cube.

Here is the cube. The diagonally folded square is behind the square in the upper right.


The photo above shows the back side of the cube. You can see the scored line - the adhesive would be behind the triangle on the upper right corner.


Here is the folded card.


This shows the card half-folded. The square that is adhered to the diagonal is pulled forward and toward the card front, folding on the diagonal score line, until it lies flat.

To decorate my card, I used the new I Dig You stamp set. This is a fun set for boys. I used the Many Marvelous Markers to color in the sections of the stamps. Once all the sections have been colored, huff on the stamp before stamping on the card stock. The huffing is just making a short fast breath (or huff) onto the stamp. This moistens the ink if it has started to dry out.


I layered two of the images on Garden Green then Pacific Point. These two will be used on the front of the card and the square that is adhered to the diagonal. I don't layer the image on the bottom inside of the card because it makes the card stock drag over the extra thickness when folding.

Add the ribbon. Cut plenty of ribbon so you can tie a bow at the card opening. Fold the ribbon in half and place the halfway mark at the fold of the card front. Attach the ribbon with some snail adhesive or double sided tape.

Adhere front image over the ribbon.

Adhere the other matted image to the upper inside square - this is the square adhered to the diagonal fold. Adhere unmatted image to the lower inside square.

Here is the card opened up.

To finish - tie the bow along the open edge of the card.

This is another cube card. The club last weekend made these.
Card stock: Peach Parfait, Pear Pizzazz, Not Quite Navy, Whisper White
Ink: Peach Parfait, Pear Pizzazz, Not Quite Navy
Ribbon: Peach Parfait
Stamp Sets: Look Who's Turning, Bring on the Cake


And here it is opened. I did mat the lower inside image on a sheet of Not Quite Navy but it does make the card hard to close. The other card moves much more easily since I did not mat the image on an additional color of card stock.

Hope you try these - they really aren't hard and once you get the hand of the fold it comes easily.
And if you are struggling with it remember - it always goes better with CHOCOLATE!

Thursday, July 21, 2011

Slider Card

We made these slider cards at my July 1st Open House and they were a big hit. Several have asked for directions so I am posting the basic instructions here. Will try to do an actual tutorial later.

The card is actually a sleeve with another piece of card stock that slides out when the ribbon is pulled.
The sleeve is made by taking a piece of card stock that is 5 x 8 1/2 inches. Score along the 8 1/2 inch side at 1 and 5 inches. Fold both in the same direction. The ends should overlap.
Adhere the ends using sticky strip.
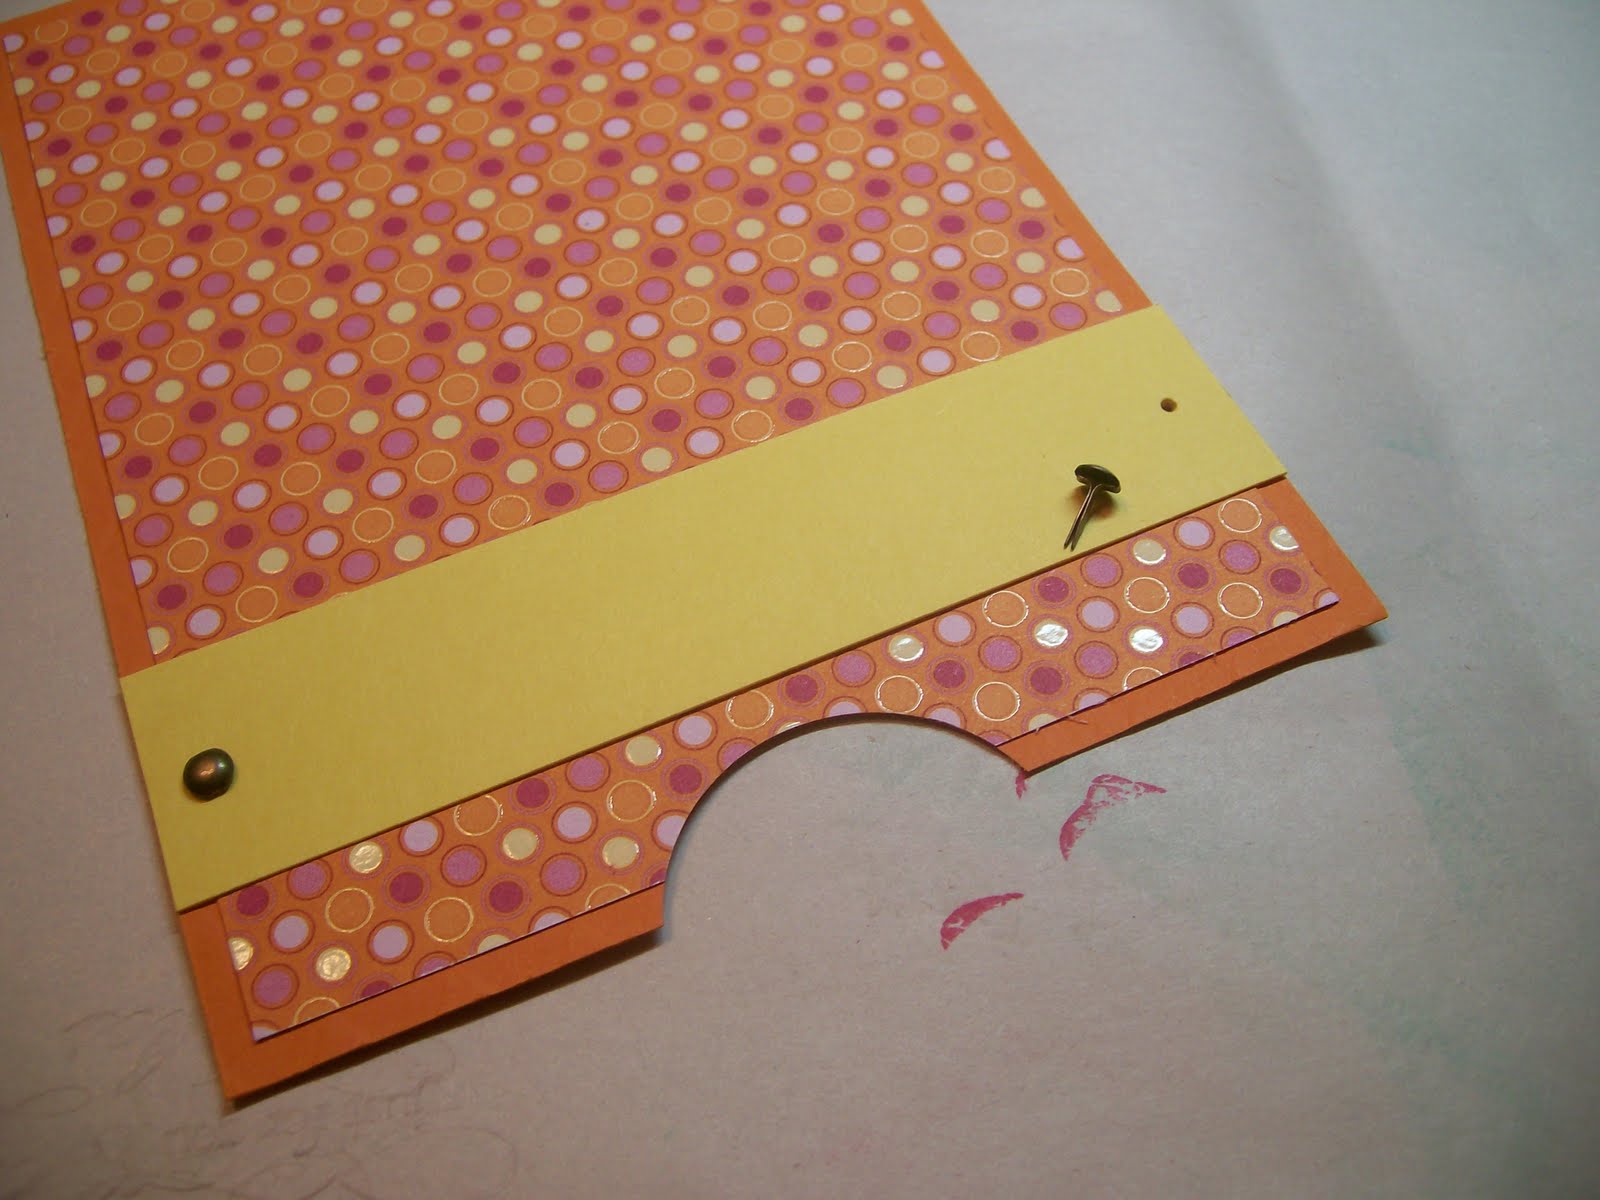
Punch a hole on the right hand side on the front – going through both layers. (seam goes to the back)

Decorate the front as desired. The dimensions of the pieces I put on the front are 3 1/2 x 4 inches and 3 1/4 x 3 3/4 inches.
The colors used on this card are Pool Party, Island Indigo and Chocolate Chip. The stamp sets are Sail Away and Bring on the Cake.


The 'slider' piece is a base measuring 3 3/4 x 4 7/8 with a stamped piece measuring 3 1/2 x 4 5/8.
Thread a piece of 1/4 inch grosgrain ribbon through both holes. Slide the slider into the sleeve, pushing the ribbon with it. Once the slider is fully inside the sleeve, tie a loose knot in the ends of the ribbon.

The colors used here are Melon Mambo, Pretty in Pink and Lucky Limeade. Stamp sets are Delicate Doilies and Bring on the Cake.


The colors used on this care were Certainly Celery, Pool Party and Calypso Coral. The stamp sets are Pennant Parade and Bring on the Cake. The Petite Pennants Builder punch was used also.

I plan to make lots of these to have on hand for children's cards. They always love something that is interactive.

Thursday, July 7, 2011

OMG Photo Album

I don't know if this album has a name but everyone I show it to says "Oh My Gosh!" when they see all the different panels and sections to put photos. So I am naming mine OMG Album. I saw one that Sue Kober (another demo) made and she got the idea from someone else so this is not original by any means although mine might be just a little bit different than Sue's.
I've made this in two sizes, 5 x 7 inches and 5 x 5 inches. The one in the tutorial photos is a 5 x 5 inch album. I have included the dimensions for the 5 x 7 in parentheses.

You can make it any size - you just have to cut your card stock the height you want. The other dimension should be twice the width you want. So for the 5 x 5, you cut the card stock 5 inches (the finished height) by 10 (twice the finished width). For the 5 x 7, you cut the card stock 7 inches (finished height) by 10 (twice the finished width). I used 5 inches for my widths because I could then use the 8 1/2 x 11 card stock. If you wanted a 6 x 6 inch square album you would need to use the 12 x 12 inch card stock and cut it 6 (finished height) by 12 (finished width).


This one is a baby album shower gift. The nursery is done in lavendar and pink with butterflies, dragonflies and flowers. And the baby is already named which was nice so I could include it on the cover. Of course, I could leave that area empty and make the name after the baby was born and add it to the album. The mom is not a real crafty person but appreciates crafty items. I will offer to add the photos when she has some, or work with her to do so.
Card stock used is Wisteria Wonder, Pretty in Pink, Pink Pirouette and some Wild Wasabi. The DSP is from the stacks of Subtles. I will identify stamp set, dies and other items as I go along. SO let's get started.

You need to cut 4 pieces 5 x 10 inches ( 7 x 10 inches) and score along the longer side at 2 1/2 and 7 1/2 inches. Fold along the score lines to make flaps.
You will also need two pieces in the finished size, 5 x 5 inches (5 x 7 inches).

Using sticky strip adhere two of the folded pieces back to back.

Add the other two folded pieces by adhering the flaps to the flaps of one of the pieces used in the previous steps - see the photo above. You should have 4 flaps on one side (I call this the front) and 2 flaps on the other side (I call this the back)


Adhere the two square pieces to the flaps on the back as shown. That gives you the basic shape. To close it you need to fold in the two pieces on the back, one on top of the other (if they do not lay nicely you may need to trim along the one edge.


Fold one panel over the other on the front being careful of the flaps. Determine where the ribbon will go to enable you to tie the album shut. I like to put just a short piece of sticky strip on the panels wherethe ribbon will need to go but do not remove the red protective film until you are ready to add the ribbon.


Decorate the panels and flaps as desired. I will go through each panel and flap to give you ideas for decorating. On the front (photo at the top of this post) I used the 2 1/2 scallop punch to make some leaves behind my flower. Then I layered a Fancy Flower punch, two of the 5 Petal punch flowers with the top one turned so you can see both. Then the 1/2 inch circle and a brad.


As you open the album you can get a little taste of what is to come. The flaps are overed with Wisteria Wonder card stock and the Pretty in Pink DSP. On the first panel I have the Punch Post flower with a couple petals from the 5 Petal Punch places as leaves.I layered the 1/2 inch circle and the circle from the trio punch set.

Open those flapsand you see a panel for a photo among the hearts. The two flaps can also receive photos. The stamp set is So Cute which is retired. The squares for the frames are 2 3/4inches and work perfectly with the pinking hearts punch.

On the center panel, I used versamark on the Wisteria Wonder for a subtle embellishment. I think it would be cute to put the Length , weight, date and time in the hearts punches.


Another panel to match the first.


This shows the album all open and free standing. Pretty isn't it? But wait there's more!


Turn the album around and you have the back side to explore. This is the very back panel. I used the Baby Tees roller and cut out the ones I wanted.


Open the back flap and you find this - Butterflies and lace. The lace border was added to cover up the seam in the base paper.

I used the windowsheet inside this frame.


The completed back side is shown here. I hope you have as much fun creating yours. Hayley has two big sisters so I plan to make albums in their favorite colors this weekend.

Wednesday, June 15, 2011

Waterfall Cards

Waterfall cards are very impressive but not that difficult to make. I have had fun playing with different stamp sets on these.


These are two I made for a club in April.


You will need a piece of Designer Series Paper (DSP) cut 5 1/4 x 4. I used Sweet and Sour but Stampin Up has so many beautiful papers, it is hard to choose.

Card stock in coordinating colors -
Card base - 5 1/2 x 4 1/4 (I used Pumpkin Pie)
Pull strip - 9 x 2 ( I used Pumpkin Pie)
Base for images - 2 x 2 inch squares, you need 4 (I used Rose Red)
Stamped images - 1 3/4 x 1 3/4 inch squares, you need 4 (I used Daffodil Delight)
Cross-bar - 4 1/4 x 1 inch (I used Daffodil Delight)

You will also need 1 3/8 inch circle punch, two brads, sticky strip, your favorite adhesive and other items as need to decorate the card if desired.


Stamp your images on the 1 3/4 inch squares and trim if desired. I like using the round corner punch on opposite corners. This stamp set is a retired one but I just received it this week from a friend. I love it!


Mount these on the 2 inch squares and set aside.


Adhere the piece of DSP to the 5 1/2 x 4 1/4 inch piece of card stock. The card stock I used here had been embossed using the Big Shot butyou can just use plain card stock.


Using a tiny bit of Snail Adhesive or Tombow liquid ahesive on just the narrow edges of the 1 x 4 1/4 inch place in across DSP. Do not put any adhesive in the middle as that is where your 'waterfall' will slide.


Using the circle punch, cut a half-circle in the center of the short edge.


Add a couple brads to the edges of the cross-bar strip.


Along the long edge of the 2 x 9 inch strip - score at 2, 2 3/4, 3 1/2, and 4 1/4 inches. Fold all in the same direction.

The pull strip should look like this.


Slide the longer portion (4 3/4 inch long) under the cross - bar.


Adhere a strip of Sticky Strip to the bottom edge of the cross-bar. Expose the adhesive.


Line up the free edge with the lower edge of the brace.


Place the first 2 x 2 square item onto the end that was just placed behimd the brace. This first image will actully be the last one to display.


For the second image piece, only put adhesive along the upper 1/2 inch of the square or it will adhere to the previous image.


Place the second image lined up with the score line.


This picutre shows that only the top 1/2 inch of the image has adhesive so the square is free to flip up and over.


Stamp a greeting on the pull strip if desired.


Add a ribbon to the pull tab if you like.


Here is the finished card.
If you want to cover the bards on the back, here is an idea.


Punch two circles. Remove brads and glue just 1/2 of each circle over the brad holes.


From the back, pierce a hole through the circle front for the brad.


Put the brad through. DO NOT push the brad through the circle on the back of the card.


Glue down the remaining 1/2 of the circle to cover the brad.


This is the finished card.


This is another card I made using the shoe stamp set. The scallop circle pieces were embossed with the Vintage Wallpaper embossing folder.

I stamped the shoes on Whisper White and colored using the Many Marvelous Markers.


Such fun stamps, shoes and 4 greetings.


If you make a waterfall card, please post a comment so I can bounce over and see yours.