Graduation Hat Card
Materials -
Basic Black Card Stock - 4 1/4 x 9 3/4
Real Red Grosgrain ribbon, 1/4 inch wide - 8 inches (Can also use embroidery floss)
Whisper White Card Stock - 4 x 5 1/4, 2 3/4 inch square
Real Red card stock - 3 inch square
Brad
Supplies -
Paper Trimmer and Scorere
Paper piercer and mat
Stamp sets (I used Teeny Tiny Wishes and Heard from the Heart)
1/16 inch circle hole punch
Score the black rectangle at 5 1/2 inches.
Fold on score line. Slide under the paper scorer ruler with the fold at 2 1/8 inches.
Make small score marks along each edge of the card stock - DO NOT SCORE ACROSS THE CARD STOCK. These marks are just to 'measure' for work you will do later. Flip the card stock over, keeping the fold at the 2 1/8 inch mark and score small marks on this side as well.
Open the card stock and place the narrow edge of the shorter section under the ruler and score a small mark at 2 1/8 inches.
Line up the top mark on one side and the bottom edge on the other side and score to connect those two points.
Repeat with the other side.
This should give you an X that crosses at the 5 1/2 inch fold line.
Line up the top mark on one side with the center mark on the narrow edge and trim away the corner. Repeat with the other side.
You card stock should look like this, with a point at the top (Sorry I cut the point off in this photo but you can see it below).
When all folded you the 'hat' should lay over the base but not completely to the bottom edge of the base.
Take the white rectangle and using a pencil mark one short edge at center (2 inches) . Mark 2 inches down both sides.
Line up the side mark with the center mark and trip the corner. Repeat for the other corner.
If you would like to make a slit to insert a gift card or cash, go down to the bottom of the blog to see how.
This will lay inside the bottom of the card. Stamp your sentiment along the bottom, then adhere inside the card.
Take the grosgrain ribbon and fold in half. Tie a knot close to the fold. You want to leave a little tab to attach it to the hat.
Trim along the very edge of one tail of the ribbon. Cut of the trim near the knot.
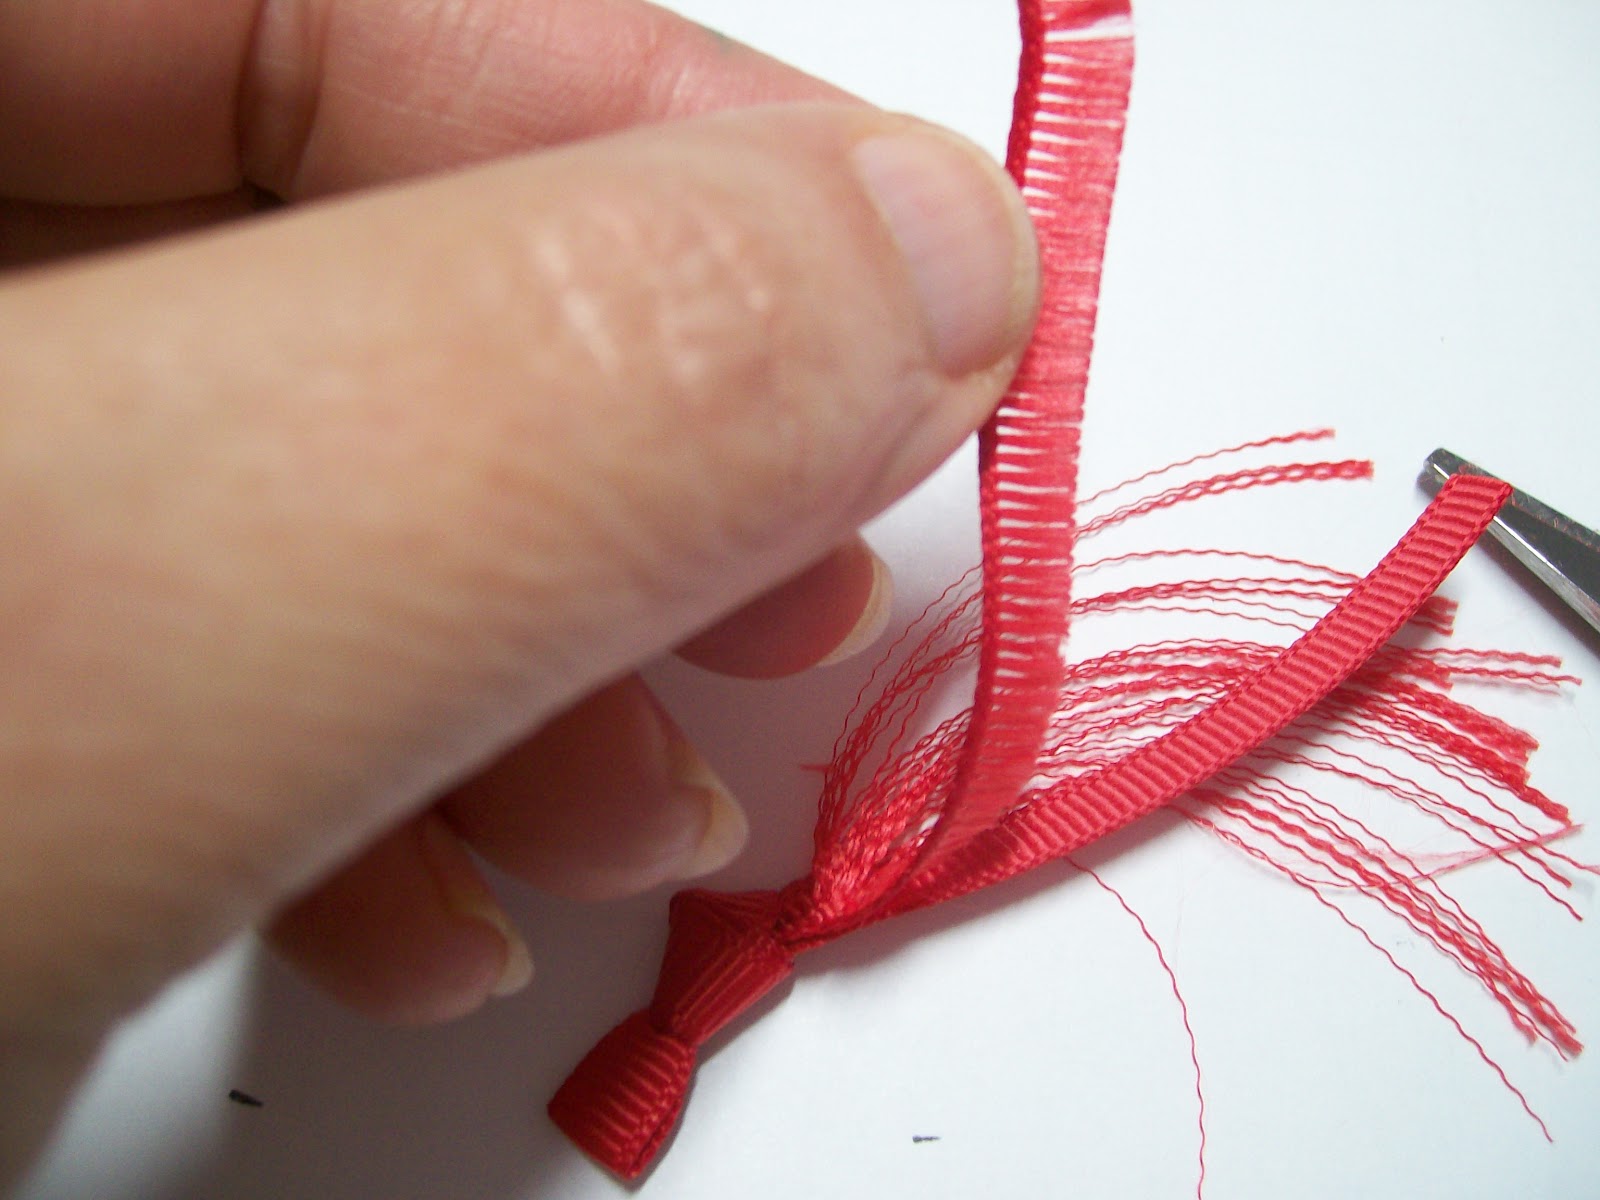
Unravel the fibers but pulling them away from the untrimmed side. Do a few at a time or they may get 'frizzy'.
When you have pulled all the fibers you will have this 'skeleton' left. Trim that off near the know.
Repeat with the other tail - and you have your tassel. You may need to smooth it out some. If it is full of static, dampen it a little with your fingers or rub it with a used dryer sheet.
Lay the tassel tab at the approximate center of the hat section. Pierce through the tassel and hat. You may need to take the piercing tool and twist it around in the tassel only to get a hole big enough to get the brad through.
Attach the tassel with the brad.
Layer the white square on the red square and put inside the hat to cover the bottom of the brad. Decorate as desired.
Here is the card closed. It does not stay closed but does work in an envelope. I you would like to make a slit to insert a gift card or cash - follow these steps before attaching the lower inside white piece.
Make a centered slit in the white card stock. I used the metric side of the ruler and cut between 23 and 29.
Using the 1/16 inch hole punch, make a hole at each end of the slit.
When adhering this to the inside of the card put adhesive only around the edges of the card stock below the slit. DO NOT PUT ADHESIVE UNDER THE SLIT OF THE CENTER OF THE CARD STOCK. I put adhesive above the slit just to keep it anchored.
And there you have it! Thanks to Brenda for suggesting that and showing me the hole punch trick.
The card can be customized to school colors - you don't have to make it black and red :-)