Showing posts with label DSP. Show all posts

Saturday, January 19, 2019

Stacked Strips DSP card

An easy but cute way to use up DSP scraps. 

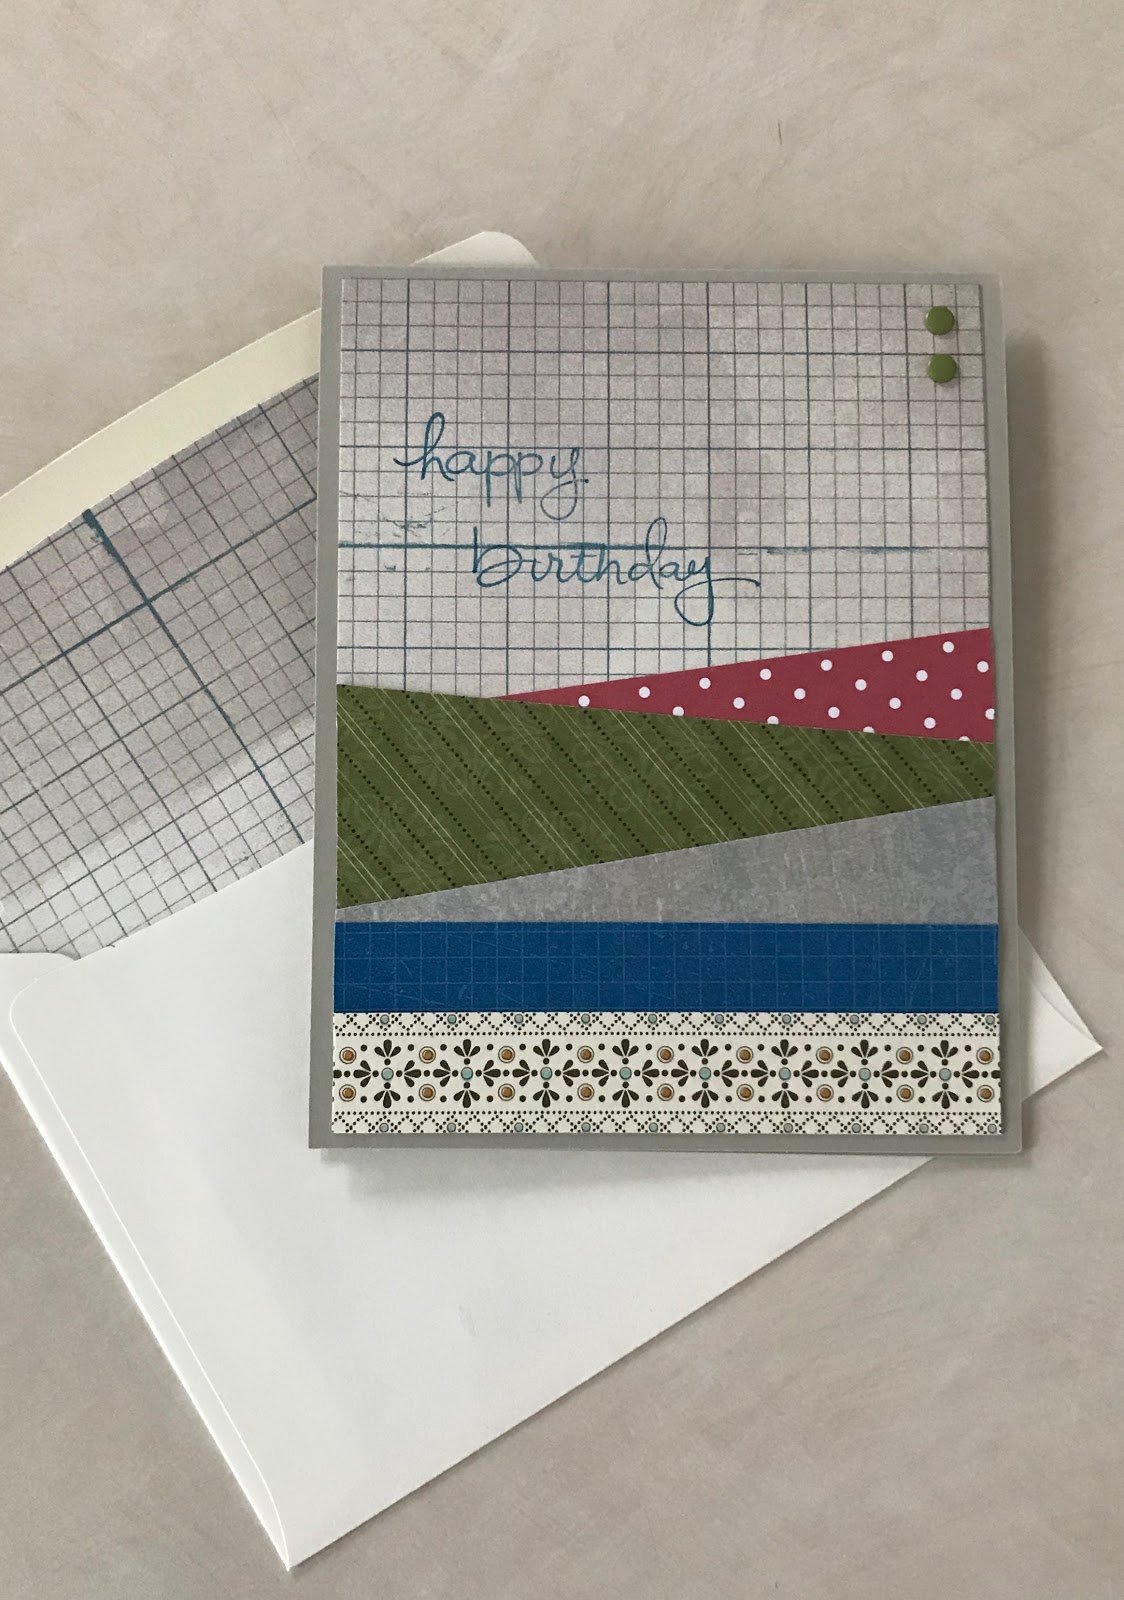
 Here is the finished card.  I will post some others at the end of the instructions just to see how different DSP strips can give it a different look.


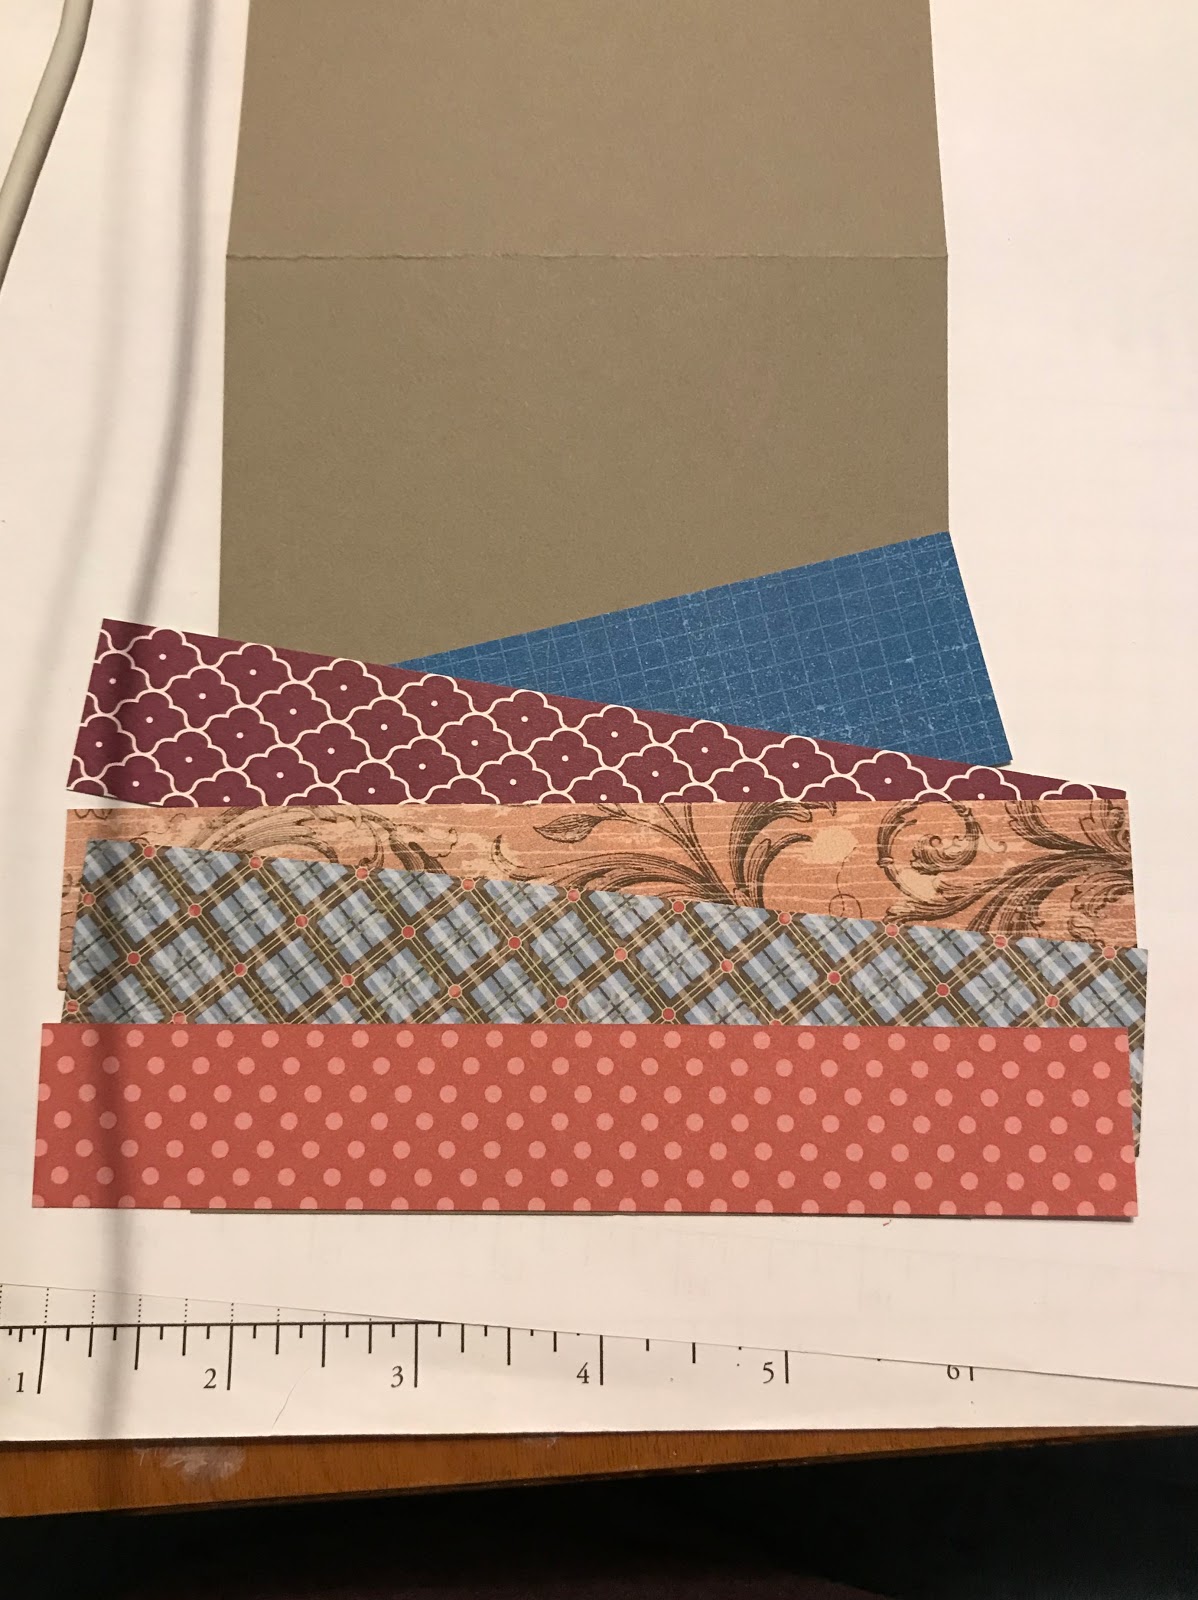
You will need a card base and 5 strips of DSP.   I prefer the 4 1/4 x 11 strip as the base for this card.  The DSP strips should be at least 1 inch wide although you could use 3/4 or 1/2 inch for one depending on how you arrange them.  Notice the blue strip is short, it is not even 4 1/4 to span the card front.  By placing it as the top strip I can use it.


Place the first strip at least halfway up the card front. Angle it being sure the right hand edge extends past the card stock edge - don't worry if the left hand side is too short.

I lay out the strips without any adhesive first to get an idea how I want to arrange them.  Place the second strip.  Be sure to cover the upper left corner of the first strip and that both ends extend past the card stock edges.


Lay third strip,  Again you want to be sure it extends on both sides of the card stock base.   Visualize where the edges are and how much of the strips will be exposed. 

 Continue with the 4th and 5th strip.  Strip #5 will lay even with the bottom of the card stock.
Look over the strips and be sure they are arranged in the order you want and that you like them all together- if not, try some other colors or patterns.  I try to use a variety of patterns/designs as well as make sure the same colors are not next to each other.  For this card, 2 of the strips are primarily blue so I made sure there were not side by side. 
Now that you are settled on the strips and arrangement, remove them and repeat the layering using adhesive to secure the strips. 

 Once you have all 5 strips adhered, turn the card over to expose the excess DSP on the sides.  Using the card stock as a guide for the scissor blade, trim off the DSP. 

 Your card front is done.  Add a sentiment, ribbon, embellishments, or whatever you want to make it your own unique design. 

 I used a script sentiment and a couple buttons.   Each card is different and special.

Here are a group I made.  I love seeing how the different papers look together.  Some are patterns I would never think to put together but when all put together I really liked them.

This is a slight variation.  I layered the strips of DSP on a separate piece of DSP cut to 5 1/4 x 4 inches.  Then I adhered the larger piece of DSP to the card front. 

Hope you like this design.  Let me know if you try it. 

Sunday, November 24, 2013

DSP Starburst

DSP Starburst

Supplies - DSP, a variety of designs with coordinating colors. 
Coordinating ribbon, fairly wide
Stamps, ink and other embellishments as desired

Cut DSP into 4 x 1 5/8  inch rectangles.


Cut each rectangle diagonally to form two triangles.  I line up the opposite points in the cutting trough and cut.

This will give you two triangles.   And since the back side is a different pattern, you have 2 of the 8 triangles needed for this technique.

Here are my 8 triangles from the DSP Birthday Basics.  Quite a variety of colors and patterns.
 I used a scrap of card stock with a straight edge and made a horizonal line on the card front (3 1/2 x 4 3/4).  You can make sure you have the line equidistant from the edge by using the grid on the paper. Line up the card front piece on the base line of the grid paper and line up the edge of the scrap paper with the grid lines.  I used 1 1/4 inch.

Draw your line - this will help with placement of the triangles. The line will be covered.


Place the DSP strips along the line but do not adhere yet.  You can play and rearrange until you get exactly the look you like.

I had numerous that had up and down to their design (ballons, bakes, candles and party hats) so I moved them around trying to get them to look just right.
 Take the first triangle and add adhesive to the wrong side.  Place the narrow tip along the horizontal line with the tip where you want the center of your starburst.
Take the second triangle and adhere to the card stock next to the first triangle. Place the edges right next to each other but not overlapping. 

Continue until all 8 triangles have been added.  The last one should come out on the horizontal line or very close to it.  You can cover up the little difference with a ribbon.
This is the back.  Trim around the card stock to remove the excess DSP.
The trimmed card stock will look like this.   Wrap a ribbon around the card stock at the horizontal line.  I cut the ribbon about 2 inches longer than the length of the card stock.
Wrap about an inch behind on one side and secure with transparent tape.

Making sure the ribbon is straight on the front, wrap the other end behind the card stock and adhere with tape. 
Add a ribbon along the horizontal line.  This will help hide any gap between the last triangle and the horizontal line.   Decorate the bottom section as desired and layer it on card stock and a card base. 
 

Saturday, November 23, 2013

Exploding Star Ornament

Exploding Star Ornament ( This is not an original design.  My sister found it on the Internet last year and we used it to make our family ornaments.  Pretty simple but impressive)

 Supplies needed:
DSP - Cut 4 squares of DSP.  I used 2 1/2 inch squares here and all the same paper.  You can vary the size and use 5 different papers for a patchwork look.
Coordinating ribbon - 1/8 inch works best
Coordinating button
Card stock in coordinating colors

 Fold the DSP squares diagonally.  The design inside at this point will be the design that shows when the star is formed.


Open up the DSP and fold horizontally so the inside design is now on the outside.  Repeat with a vertical design - making a + with the last 2 folds  with one diagonal fold.
 When open it will look like this.   Pushing up on the diagonal lines and folding on the vertical and horizontal folds will make ...

 a small square like this.    Be sure your folds are creased well.  If the edges don't match exactly it is okay. 

Here are all 5 folded and waiting to be assembled.  

Put adhesive on one of the small square sides.  Place two of the pieces together matching the outer points on the squares and the center of the squares. 

 Continue with the other 3 pieces.  DO NOT GLUE piece #1 to piece #5.  It should begin to look like a star. 


 Place a small strip of Sticky Strip lined up from the center to the outer tip of either the first or last square.  Remove the red film.

Cut 2 pieces of ribbon about 5 inches long.  Place one end of a piece of ribbon on the sticky strip. 
 Make some decorative accents to cover the ribbon ends. I stamped a Mosaic Madness design on Very Vanilla.   I then used the Mosaic punch and 7/8 inch scalloped circle punch.

Place a short strip of Sticky Strip on the back of the accent you just made.  I try to place it horizontally so it will be perpendicular to the piece that you added to the DSP for the ribbon. 
 Place the accent over the ribbon.    Repeat this with the other end.

Trim the ends of the ribbon at thin angles.  The thinner the better.  Thread each end of ribbon through one of the holes on the button. 


 Slide the button down to the ornament.  Straighten any twists in the ribbon is neeced.
 Make an overhand loop and tied a knot in the ribbon.

 This is the finished ornament closed up.  It is cute but look at what happens when you...
 slide the button up so the squares fan out  and.................
 slide the button back down the ribbon until .....
the button rests on top of the DSP.  You get a star in the center of that ornament. 

This one used a 2 inch square.  It was a little harder to work with because of the size but still not bad.
Here it is opened and you have the star.

Monday, September 2, 2013

Twister Pattern


This is the Twister pattern.  It is based on a quilt pattern I saw recently. 


You begin by cutting 1 inch squares of Designer Series Paper.  I am using some retired Bright Blossoms.   You need 4 squares of 4 different designs.


I adhered each set of 4 squares on Whisper White card stock.  I think the next one I will use just plain white printer paper.  The multiple layers of card stock makes the design rather thick.


I used the second smallest square of the Squares Framelits to cut out my design.  I 'twisted' the framelit until it just hit the edges of the square.   I used a pencil to make little marks on the framelit where the DSP designs meet (sort of like seams).  That makes it easier to line up the other 3 squares and make sure they are all identical.
Cut using the Big Shot.

Repeat with the other 3 pieces .  You will have 4 identical pieces. 

Arrange the pieces so the same designer paper meets up in the center. 

Adhere to white card stock (I will use plain white paper the next time).   Trim along the edge of the Twister square. 

Use your Twister square to decorate a card front.  I managed to cut a large scallop square using the large scallop square from the framelits set but it was not as easy as I thought it would be.  I will have to play with that some more and post if I get it figured out.