Saturday, October 9, 2010

Punchy Rudolph


I love the punch art reindeer - and it has been so much fun making a whole set of these for some scrapbook pages. Here is a layout of what you will need to make a reindeer. You can alter the colors to make each one unique.

You can gather all these before you start or just have the punches and paper handy to punch as you go along.
Let's get started!

I usually start with the body. You will need the large oval and the small oval . Connect them to the scallop square which is the blanket for the reindeer.

Trim the hearts and cut the boho flowers in half to make the shoes. The shoes can be altered by changing the color of leaving off the flower trim at the top so they look more like boots.

I think the easiest way to punch the legs is to punch your wide oval for the head then line up the punch along the edge and punch a narrow strip.

You will need two of these and then cut them in half to make the 4 legs.

Attach the shoes to the wider end of the double-punched oval pieces. Be sure the oval curves in the correct direction.
Attach the legs to the body. Play around with the placement to get them just where you want them.
Next comes the head - attach the antlers to the back of the head near the top. You have to leave room for the ears.
Attach the ears below the antlers. Check the position from the front.
Add the nose and eyes - the white gel pen really makes them pop. I used a dimensional to adhere the nose. If you are doing a whole group of reindeer you would only need one with a red nose (dear old Rudolph) and the others would have basic black, basic gray or maybe early espresso for the nose.
Attach the head at the neck. You can tilt it at different angles to see exactly which look you like best. Different angles give the reindeer a little attitude :-) And don't forget the tail ! I usually place the petal point downward and attach to the rear.

I tied a knot in the 1/4 inch real red grosgrain and glued it at the neck. Then decorate the blanket however you want. For this one I used the largest boho blossom and punched the center of the blossom using the 1/2 inch circle punch. I punched a small circle using the itty bitty punch set and placed it in the center.

If you try some - please post a link to your photos so I can check them out. Would love to see your ideas on how to decorate or improve my reindeer.

Trifold Card

This is a picture tutorial for a tri-fold card that has become really popular. I am showing it with the Garden Greenhouse stamp set (one of my favorites!) but it can be done with many other themes.

Card Stock: Pacific Point, Whisper White
Inks: Melon Mambo, Bravo Burgundy, Perfect Plum, Elegant Eggplant, Marina Mist, Pacific Point
Ribbon: 3/8 inch taffeta Marina Mist
Stamp Set: Garden Greenhouse, Herb Expressions

To being you need to choose the color combinations for the two step stamp set. These are the colors I am using today but I have done other combinations and all have been lovely.

Cut a piece of Whisper White card stock to 5 x 11 inches. Using the largest flower background stamp and Melon Mambo ink, randomly stamp flowers in one of the base colors from the lower side of one 5 inch edge to the upper area of the other 5 inch edge. These should basically follow a diagonal line but not actually 'touch' each other.

Fill in some with the second largest flower base stamp and Perfect Plum ink.


Fill in with the smallest flower background and Marina Mist ink. You should have a continuous row of flowers - if not, fill in as needed with all three flowers.

Trim away the white card stock about the row of flowers. You can get as detailed as you want when cutting. I usually don't do a lot of detail since that makes the next steps a little harder. (I have laid the white paper on a piece of Pacific Point so it is easier to see the edges.

Turn the paper over to the blank white side.

Repeat stamping flowers on the blank side. These do not have to be exactly like the flowers on the other side. If you are really detailed you may want to use the Stamp-a-ma-jig to get the flowers lined up exactly with the cut edge. I just tried to get close to the edge and did go over the edge a time or two but it is not noticeable. Use all three flower stamps and the colors you used on the front until you have a continuous row across the back.


Use the second stamp for the largest flower to add the detail to those images using Bravo Burgundy. Be sure to do both sides of the paper.


Follow with the other flowers using Elegant Eggplant on the Perfect Plum flowers and Pacific Point on the Marina Mist flowers.
Stamp a sentiment if desired This is stamped on the front side at the right end of the piece of card stock - the taller edge. I used one from Herb Expressions.

Score 4 inches and 8 inches from the taller edge. Fold in opposite directions.

Take a piece of Pacific Point - 5 1/2 x 4 1/4 and adhere an 18 inch length of ribbon near the bottom. I put my ribbon slightly off centered because I wanted to tie my bow off-centered.

Adhere the white card stock over the ribbon.
Fold along the score lines and tie the ribbon on the front. Isn't that a special card for a special friend?

This is another version that I came up with that doesn't use the ribbon. Make the card - omitting the ribbon step. Adhere the front pieces together. This just makes a two-sided front to the card.


I stamped and cut out a couple more flowers and added them to the lower left front to cover the fold. The smaller one is adhered using a dimensional.
Here are some other ideas for this style of card:
Using the Starring You stamp set and a variety of bright inks. What a great birthday or congratulations card!


This one uses the I Heart Hearts stamp set - sweet valentine?
A cute Christmas card using the Delightful Decorations stamp set. There are lots of possibilities - if you come up with one please post me a link to your photos.


Monday, September 6, 2010

Keepsake Box


Several have asked how to make the Keepsake Box so here are the instructions. Here is a new one I made today with the step by step photos.


For this box, I used Ruby Red, Chocolate Chip and the Merry Moments paper. The ribbon is Chocolate Chip 5/8 inch satin.


You will need a sheet of 12 x 12 inch card stock and an 8 1/2 x 11 inch card stock in the main color (Ruby Red), a sheet of 12 x 12 of the designer series paper (Merry Moments) and a 8 1/2 x 11 inch card stock (Chocolate Chip).


Cut one inch off one side of the 12 x 12 inch card stock to have an 11 x 12 inch piece.


Cut the 8 1/2 x 11 piece of the main color to 8 1/8 x 9 1/8.


Score the 11 x 12 inch piece at 3 inches on all 4 sides. Score the 8 1/8 x 9 1/8 piece at 1 1/2 inch on all sides. The score lines don't show up in the photo.


Cut along the score lines along one side of the piece of 11 x 12 inch card stock - cut only up to the intersecting score line. Do this along the opposite side. This will create flaps on each corner.


Turn the card stock over and place Sticky Strip on the flaps in each corner.


Turn the card stock back over so that the Sticky Strips are facing down. Fold up one side and tuck the flap inside the adjoining strip. Remove the covering and expose the sticky strip, adhere to the adjoining side of the box creating the corner. Repeat with the other three corners. Be careful to not let the Sticky Strip touch the other side before you have it lined up. Sometimes there is just a little bit that sticks out above the main box side - you can just trim that down.


Before putting the lid together, decorate the top and sides. Cut the following:


Card stock - color 2 - (Chocolate Chip)


one piece 5 x 6 inches


two pieces 5 x 1 1/4 inches


two pieces 6 x 1 1/4


Designer Series Paper


one piece 4 3/4 x 5 3/4 inches


two pieces 4 3/4 x 1 inch


two pieces 5 3/4 x 1 inch


Trim corners if desired - I like using the Ticket punch.


Adhere the designer series paper to the appropiriate pieces of card stock.


Adhere the 5 x 6 inch rectangle to the top of the lid. Adhere the other pieces to the side of the lid.


Using Sticky Strip, tape the lid together as you did with the box bottom.


The finished lid looks like this.


Place the lid on the box bottom. Now you can decorate the lid however you wish.


I cut out some of the snow flake designs on another sheet of the DSP and added the 5/8 inch satin ribbon to the sides of the lid. Wouldn't this be a great way to give some packets of hot cocoa, instant soup, teas, coffee, anything for a snowy winter's day?

Friday, August 27, 2010

Scalloped Pinwheel

This is a tutorial for my modification of the pinwheel - a scalloped pinwheel.

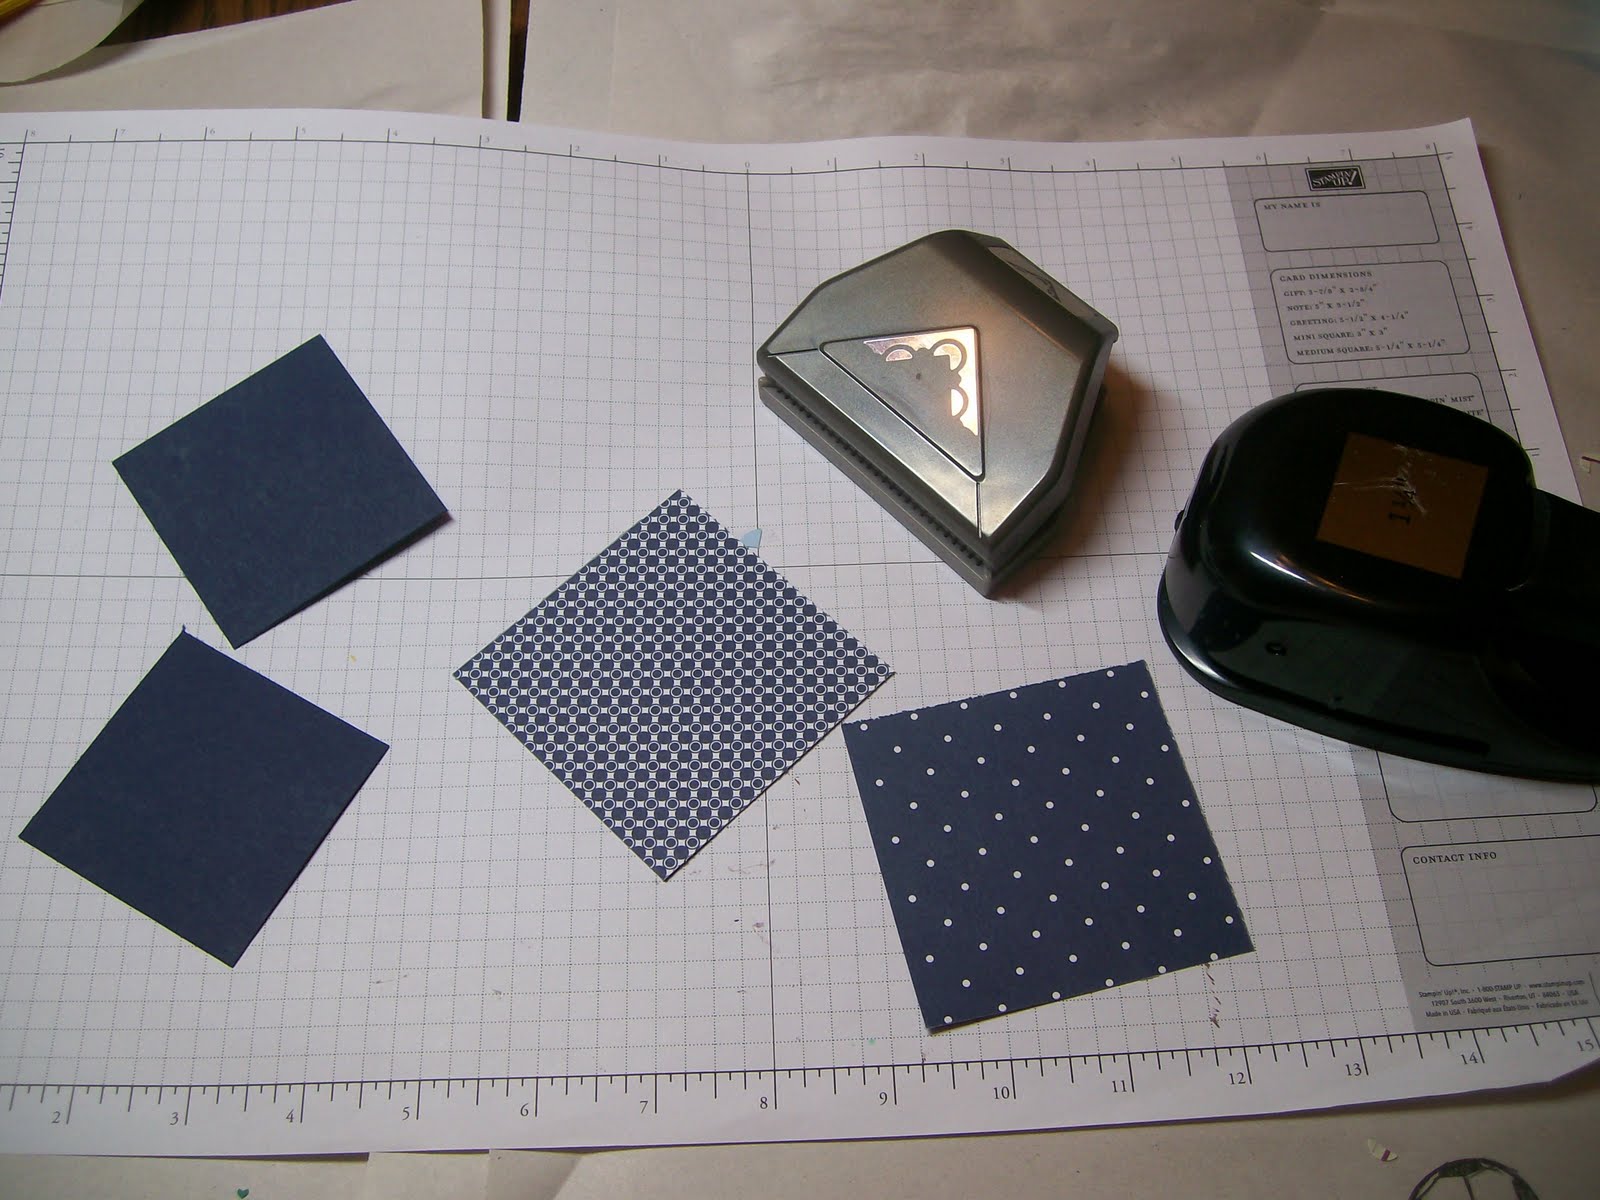
You will need two 3 inch squares of DSP of your choice and two 2.5 inch squares of the card stock that you want to use as your base. You also need the scallop corner punch and the 1 1/4 inch square punch (You can cut the squares without the punch if you don't have that one) I am using Night of Navy card stock for the base and two DSP Night of Navy sheets from the Pattern Pack III that is currently a Level I hostess gift.


Using the scallop border punch, trim the four corners of the DSP squares.


Using the 1 1/4 inch square punch cut off each corner. You can also use your paper trimmer to cut these squares.


So you now have 8 squares with one scalloped edge - 4 of each design/color.


Place one of the card stock squares at right angles to the other - glue together. Using the grid paper helps a lot getting this lined up perfectly; however, I did many without the grid paper and had no problems with them looking lopsided or off center.


Adhere one of the scalloped squares to a tip of the base - only put adhesive on the right hand side so you can later slide the last piece under the left edge.


Adhere the alternate design/color to the next tip. Alternate squares as you work clockwise around the base.


When adhering the last square you will have to work it under the first square. Then add a little adhesive to the first square's left side to adhere.
(I use Tombow glue for this and it works well - just a small drop in the corners.)


Here is the finished pinwheel. Since my centers rarely match up perfectly I add a sentiment oval or a button to the center.


For this one I used the clear bitty buttons and a piece of DSP punched with the coordinating punch. These are available in the summer mini-catalog.


Here is the finished pinwheel ready to adhere to the front of a card. I loved using different DSP to see what affect I could get - here are some of my finished products:


This one uses Cottage Wall DSP on a Very Vanilla base then placed on a Rich Razzleberry card base. I also used Rich Razzleberry and Orchid Opulence punched with the Boho Blossom punch behind the bitty button.


This is also Cottage Wall on a Rich Razzleberry base on an Orchid Opulence card. The sentiment is stamped using Rich Razzleberry on Orchid Opulence and then mounted on the Rich Razzleberry scallop oval The ribbon is 5/8 inch grosgrain Old Olive just tied in a knot and adhered with a mini glue dot.(This is one of my favorites!)


For this one I used 4 of the colors in the Pattern Pack III (hostess gift in the current catalog), Mellow Moss, Night of Navy, Sahara Sand and Ruby Red placed on a Very Vanilla base. The sentiment is stamped in Not Quite Navy on Very Vanilla mounted to a Sahara Sand scallop oval. The card base is also Sahara Sand.


This one also used the Pattern Packs III paper - only the Ruby Red and Sahara Sand mounted on Night of Navy card stock. The card base is Sahara Sand. Using the same design but different colors gives the pinwheel a different look.


This is the pinwheels I made in the tutorial - I place it on a card of Sahara Sand. I love these because I can just make up the basic card and add the sentiment later. Or use with no sentiment and just write the message inside. Great cards to have on hand!


This one uses Bella Bleu and I think it has a different look because the papers sort of blend together. Love this one!


The Bella Bleu one gave me the idea to try one using just one DSP and here it is. This is also a cute idea. The scallops give the card a sort of 'doily' look. I liked making these so much I have added them to our club agenda for today. I am going to just let the ladies pick their DSP and colors and decide what type they want to make.


I think the very first one I made is still my favorite (maybe because it is my daughter's wedding colors :-) I do think the background card stock makes a difference. You want to be sure there is enough contrast so the scallops show up nicely.
Hope you enjoyed my little adventure with the pinwheel. If you make some - please share your pictures - and if you would like to make some but don't have the tools/supplies contact me, I can help you get them :-)