Sunday, April 22, 2018

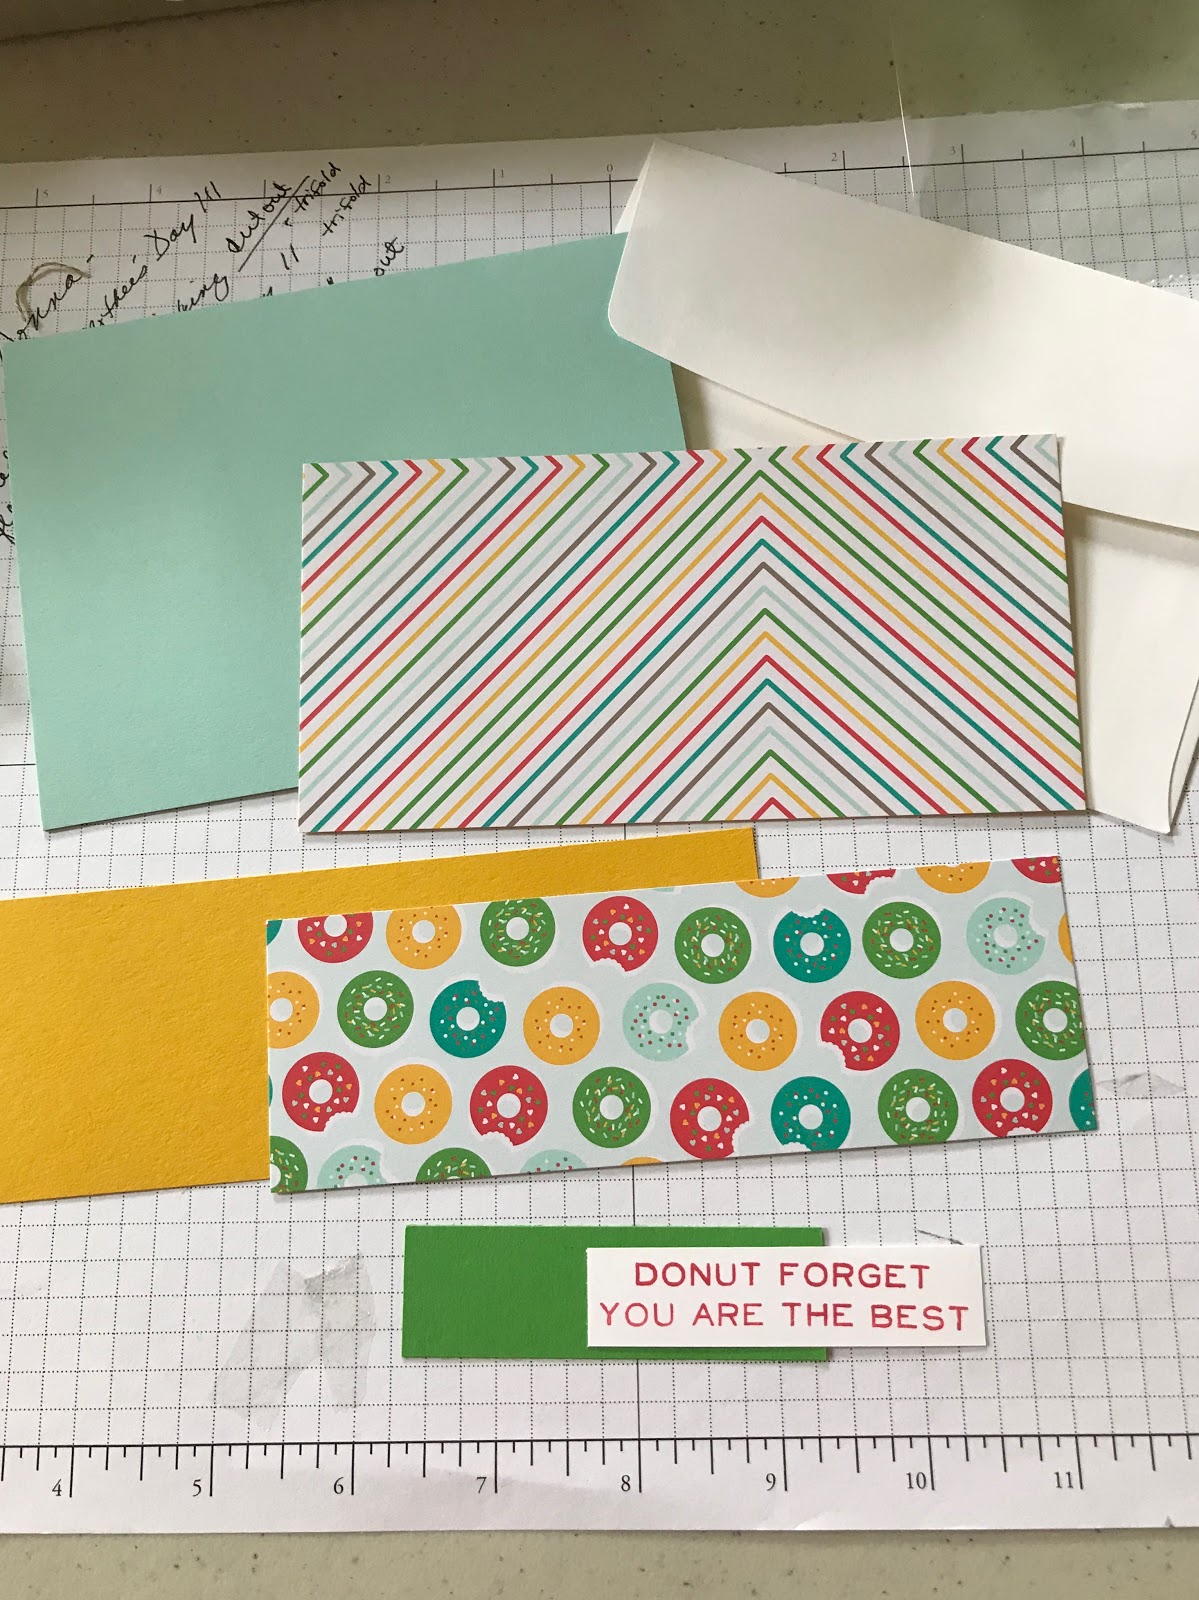
Donut Card - Kit instructions ( Celebrate card)

Kit contents -


Card stock - Mint Macaron 8 1/2 x 5 1/2 folded in half,  Crushed Curry 6 inch by 2 1/2 inch,  small rectangle of Gumball Green card stock , small rectangle with sentiment (colors are listed based on the photo.  Kit colors may differ)   CELEBRATE Card also contains a punched balloon of Crushed Curry
DSP (Designer Series Paper - two-sided print) - 2 inch x 6 inch piece.  2 1/4 x 6 inch piece
White envelope


Adhere sentiment to the small rectangle.  


Adhere 2 x 6 inch piece of DSP to the 2 1/4 x 6 inch piece of card stock.  The card stock should create a thin border on the long sides - but not on the short sides. Adhere strip to the card front  - line up one end and the strip will extend about 1/2 inch.


From the back side, trim the DSP/card stock strip to match the card front.

 Peel the paper backing off the foam adhesives of the sentiment strip and then place where you want the sentiment.


If making the Celebrate card, Adhere balloon using the foam dimensional attached to the back.  You may want just a drop  of glue on the lower portion of the balloon so it adheres to the sentiment piece.  


The 2 1/4 x 6 inch piece of DSP is to decorate the envelope flap.

 Add glue to the outside of the flap.

 Place the piece of DSP onto the flap, lining it up to the fold. . 


From the back of the flap, trim the strip.

 Finished donut card and envelope. 

Finished Celebrate card.

Saturday, April 21, 2018

Brick wall - cut out card - Kit instructions


Kit Contents
Card Stock : Elegant Eggplant - 4 1/4 x 5 1/2 inches, Whisper White  4 x 10 1/2  inches (folded in half), Whisper White 4 1/4 x 3 (embossed with Brick Wall), Mossy Meadow 4 1/2 x 3 1/4, three Pale Plum flowers, 2 leave stems of Tip Top Taupe,  linen twine.


Using adhesive of choice, adhere brick wall piece to Mossy Meadow -

 Place the brick wall piece for the Mossy Meadow creates a frame.


Using the linen twine, wrap around the narrowest part of the Mossy Meadow/Brick Wall piece.   Tie in a knot,  


Trim the ends of the twine if desired.


Place foam adhesives (dimensionals) on back of Mossy Meadow pice. 


Adhere to Whisper White folded piece.  Be sure sentiment shows. 

 Adhere the folded Whisper White to the Elegant Eggplant rectangle.


 Card should look like this now.  Just need to add the flowers and leaves.

 Arrange the leaves and flowers in various places to see where you like them best.  Place the two stems with leaves down, then place flowers over them.
There is no right or wrong placement - just where you like them best.

 One option is to put them at the upper left of the brick wall. 


Or lower left.....


I chose lower right, below the cut out.   When you have decided where to place them, put very small drops of glue on a couple of the leaves. Place them on the brick wall.  You may want to trim the stem a little.   Add 2 of the flowers using glue.  Add third flower with foam adhesive (dimensional). 


Magnetic Post-it Note Folders

Post-It Note Holders - with magnets


Cut a piece of cardstock 3 1/4 inches by 8 1/2 inches.  Cute coordinating DSP into rectangles,  3 inches x 2 1/4 inches and 3 inches  x 2 3/4 inches.


Score the card stock along the long edge at 2 1/2, 2 3/4, 5 3/4 and 6 inches.  I split my post-its pad in half to make a slim pad. If you want to use a full pad of post-its, make your score marks at 2 1/4, 2 3/4, 5 3/4 and 6 1/4.


I trimmed one of the short edges using a border punch.  You can also round the corners.
Adhere the larger DSP rectangle to the center of the cardstock on the back side.


I split the pad of post-its by pulling them apart near the middle of the stack.   I like the thinner pad for sliding into purse pockets.


Add the Post-Its.   I used double stick tape on the back of the pad.  Be sure to adhere so the top of the post-its are toward the top of the holder.


The post-its just fit between the 2nd and 3rd score lines.


Fold the bottom section up.  May have to force it a little it the fit is too snug but they are very forgiving.


Fold down the top of the cardstock over the bottom.   You can use velcro or tiny magnets to keep the holder closed - or if you want you can just decorate it without.  I have also use ribbons adhered under the DSP to tie around the front to hold it closed.


I made some flowers to decorate the front and adding a label that says 'thankful for you'.  I chose Gumball Green for the tag, sort of like a green leaf.


I used small craft magnets.   Place a pair of magnets on either side of the front flap.  I made sure the flower would cover the magnet before adding a glue dot.

 This shows the magnet on the back side of the flap.  With the magnets on either side of the flap. add a glue dot to the one under the flap.


Add the glue dot to the exposed side of the magnet.  Close the flap so the glue dot adheres to the lower flap.

 Adhere the magnet to the top side of the flap using a glue dot.  Place another glue dot to the exposed side of the magnet.


I used LOTS of dimensionals to adhere the flower and tag.  I don't want a petal curling up or getting caught and torn.  The petal under my thumb will not get a dimensional since it will get adhered tot he magnet.


Adhere the flower and tag using the dimensionals.  Make sure the magnet is covered.  
Adhere the smaller rectangle of DSP to the bottom flap.  The magnet makes it a little bulky but I just made sure the edges were adhered well.


I got all of these made today.  Aren't they bright and springy - such a cloudy, gray day here so these are especially warm.


Closer view.  I am really pleased with how they turned out.

Wednesday, July 22, 2015

Exploding Card

I have seen some others call this 'Fun Fold' but I call it 'Exploding Card'.  At any rate, it is a fairly simple but interesting card technique.


Cut 8 inch square of DSP.  The piece I chose has a Baja Blue stripes on one side and a Cajun Craze pattern on the other - lots of contrast.  


Using the diagonal scoring plate, make a score line at 3 inches on each side.  This will create a small triangle in the center along each side where the score lines cross.


This is the small triangle.  Cut away the small triangle to make what will look like a large notch along each side.


The small triangles have been cut out.   Remove the diagonal scoring platform and place the DSP in the corner of the scoring platform.   Score at 1 inch - JUST ON THE UPPER PORTION.  The scoring should stop at the large notch.


Fold on the score mark on all 4 sides.


All 4 sides are folded on the score lines.   Flip the paper over and begin folding in each side.


 One side is folded.  Continue with the other 3 sides.


 When you get to the last one, you may need to loosen it up a little to get that one tucked in under the others.


Gently tuck the last section into the other ones.


Sometimes one or two of the corners might not lay nicely.  I use a bone folder and press from the center outward.  


This is the finished product.  I added a small circle with Open on it so the recipient will know to open up the card there.


Here are several that I made.   You can adhere this to a 4 1/4 x 5 1/2 rectangle


This is the card my sister made.  She put it on a 4 1/4 x 5 1/2 inch rectangle and added a strip of card stock and ribbon. 


I put this one on a 4 1/4 inch square.  Then decorated it with some die cut leaves and linen thread.


Add your sentiment to the inside of the fold.  For this one I used the triangles that I cut out of the DSP and put them in the corners of the Very Vanilla square with the sentiment.